Installation
The following guides you to the basic installation method for using the WhaTap server monitoring service.
To use the WhaTap monitoring service, after Sign in, create a project and install the agent to the target server. For more information about registration as a member, see the following.
See the following video guide.
Creating a project
Create a project before installing the agent.
-
Log in WhaTap monitoring service.
-
To create a project, on the left of the screen, select All Projects > + Project.
-
Select a product in Select product for installation.
-
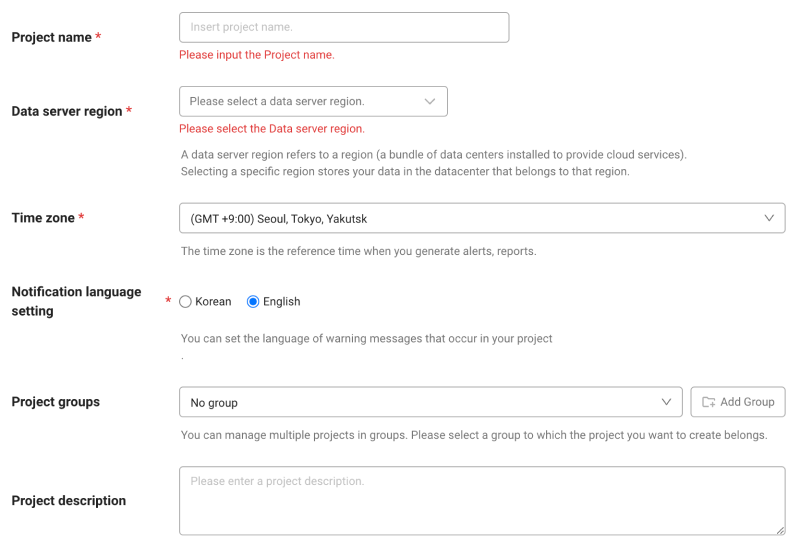
Configure the settings for Project name, Data server region, and Time zone.
-
In Notification language setting, select the language for alert messages.
-
After all settings are finished, select Creating a project.
-
A Data server region refers to a region (a bundle of data centers installed to provide cloud services). Selecting a specific region stores your data in the datacenter that belongs to that region.
-
Time zone is the reference time for generating alerts and reports.
-
To group multiple projects for management, select a group from Project groups or add a group. For more information about grouping, see the following.
-
To add a project with an organization selected, Groups of organization must be set.
Choose operating system
On the Agent Installation screen, select the agent OS to install.
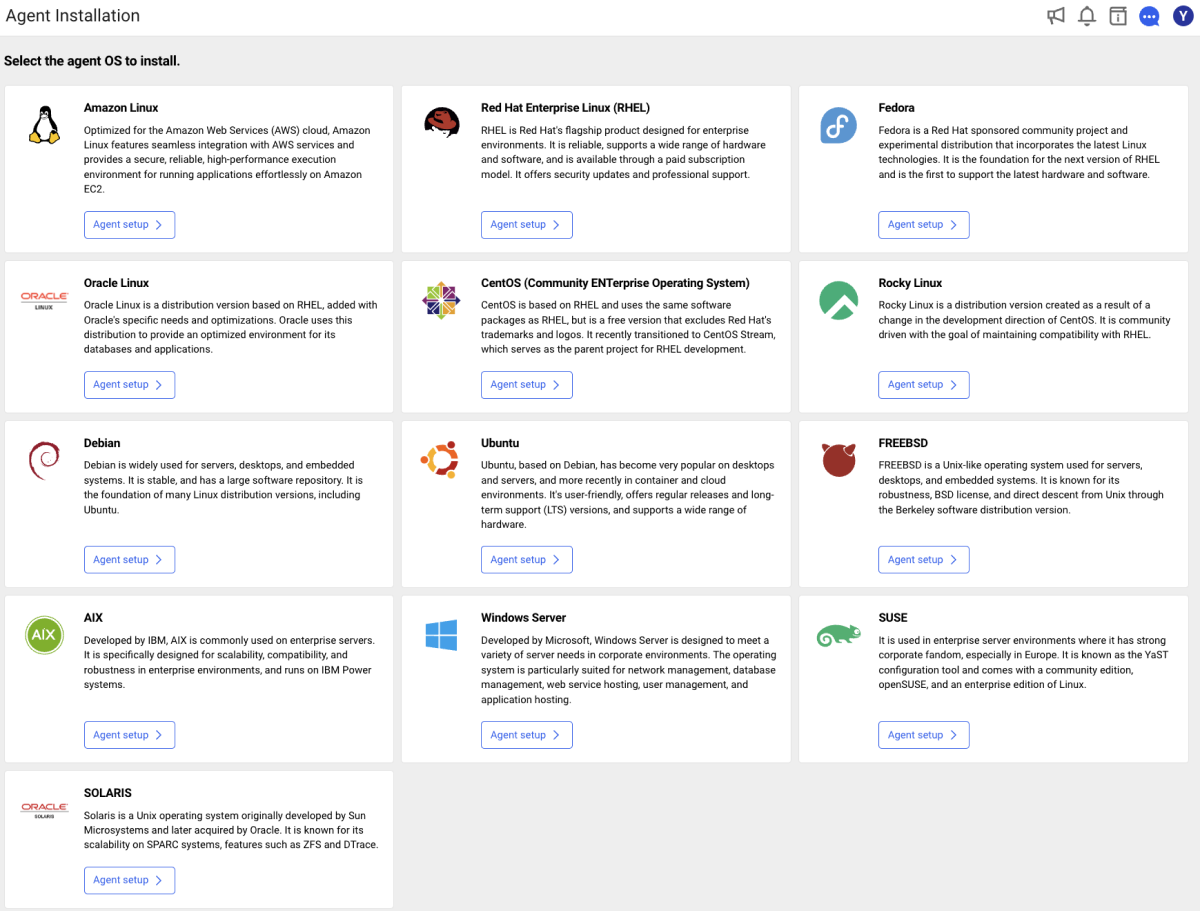
After a project has been created, the Agent installation page appears automatically. If the Agent installation does not appear, select All projects on the left and then select a newly created project.
Checking the project access key
Project access key is the unique ID for activating the WhaTap services.
In the installation guide section, select Getting the access key. After automatic reception of project access key, proceed to the next step.
Installing the agents by OS
Server agent installation file configuration
-
Common files
-
ChangeLog.txt: Agent's revision history
-
whatap.conf: In this file, the address of the server to collect data and the server's project access key are entered.
-
-
Linux/FreeBSD
-
whatap_infrad: Agent that collects and transmits data.
-
whatap_infrad.pid: File in which the PID of the running agent has been written.
-
VERSION: File in which the versions of the installed agents have been written.
-
-
Windows
-
whatap_infrad.exe: Agent that collects and transmits data.
-
unins000.: File to delete any agent
-
whatap.ico: Image of the WhaTap infrastructure icon.
-
After project creation, Choose Operating System and Project access key confirmation are common steps.
Installation methods depending on the OS are as follows. Before installing and applying the agent, first check the Support environment. It explains how to install the WhaTap server monitoring agent in the Linux environment. It provides a method to install the WhaTap server monitoring agent in the Unix environment. It explains how to install the WhaTap server monitoring agent in the Windows environment. It explains how to install the WhaTap server monitoring agent in the environment other than the server computer. It explains how to install the WhaTap server monitoring agent in the elastic beanstalk environment.Linux
Unix
Windows
Cases other than the server computer
Elastic Beanstalk