Quick agent configuration
You can quickly and easily configure the agent by running the setup.sh file among the DBX agent configuration files.
Unzipping the downloaded file
Unzip the downloaded DBX agent file.
tar -zxvf whatap.agent.database.tar.gz
Running setup.sh
Run the setup.sh file and then follow the on-screen instructions to configure the agent, enter the DB server information, download JDBC, create an account for monitoring, and set the roles. Enter the required data to automatically complete all settings.
./setup.sh
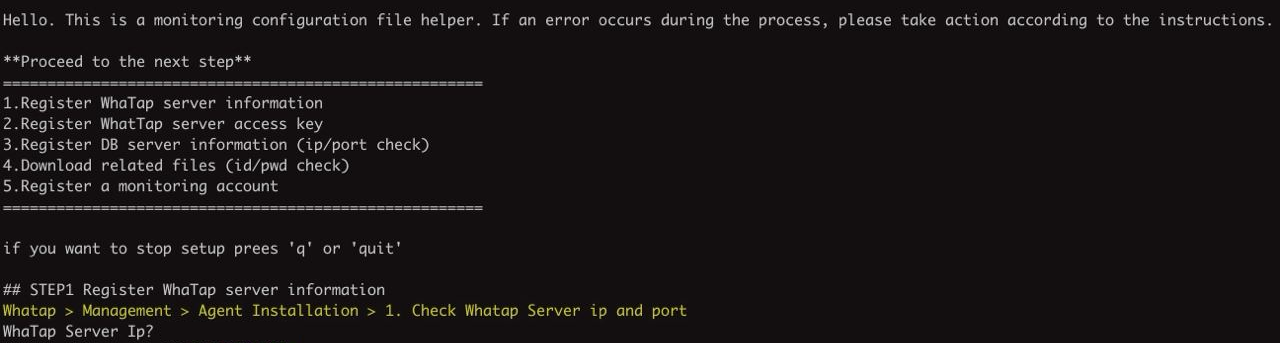
To cancel the agent configuration process, enter 'q' or 'quit' and then press Enter.
STEP1 Register WhaTap server information
WhaTap Server Ip?
WhaTap Server Port (default 6600)?
Enter the WhaTap's server information. In the DBX Agent Setting section of Management > Agent Installation, you can see the server IP and port number.
The default value of the WhaTap's server port is 6600. If you press Enter with no entry, the values are set to default.
STEP2 Register WhaTap server access key
WhaTap Project Access Key?
Enter the project access key. In the Check access key section of Management > Agent Installation, select Copy and then paste it.
If a correct access key is entered, the project code is output.
STEP3 Register DB server information (ip/port check)
Monitoring DBMS type?
Monitoring DBMS Server Ip?
Monitoring DBMS Server Port?
Enter the information of the database server for monitoring.
-
Monitoring DBMS type: Select a type of the database displayed on the screen.
-
Monitoring DBMS Server Ip: Enter the IP address of the database server.
-
Monitoring DBMS Server Port: Enter the port number of the database server.
After entering the IP address and port number of the database server, verify the connection status. If you enter incorrect values, you must enter the IP address and port number again.
STEP4 Download jdbc driver
The JDBC driver that matches the OS and database server version is automatically downloaded to the DBX agent path.
STEP5 Register a monitoring account
Monitoring Database Name?
Monitoring User ID?
Monitoring User {user_id}'s Password?
Connecting DBMS Server with SSL (default false)?
It is the process to generate an encrypted UID for database connection. Enter the account created in the Create account section.
-
Monitoring Database Name: Enter the name of the database to monitor.
-
Monitoring User ID / Monitoring User {user_id}'s Password: Enter the account ID and password. Passwords are saved encrypted.
-
Connecting DBMS Server with SSL: Enter
truewhen connecting to the database server via the SSL protocol. The default value isfalse.
Running the agent
If you complete the agent installation process by using the setup.sh file, database information and settings in the whatap.conf file appear.
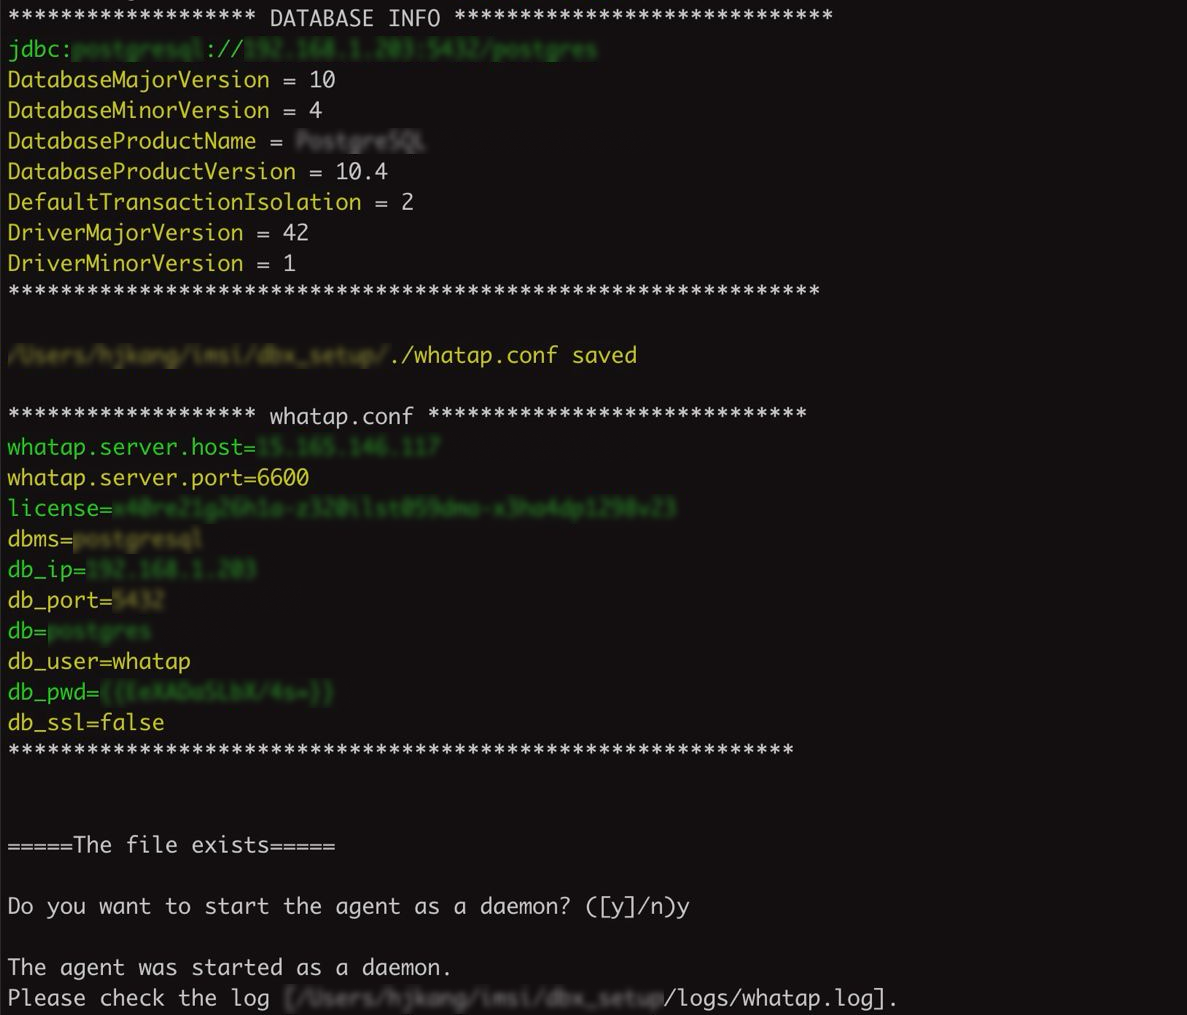
To use the agent like a daemon, enter 'y' in the last field.
Next steps
-
After completing the agent configuration, see the following and then perform inspection according to the checklist.
-
To monitor the resources of the database server by installing an additional agent (XOS), see the following.