Notification message customization
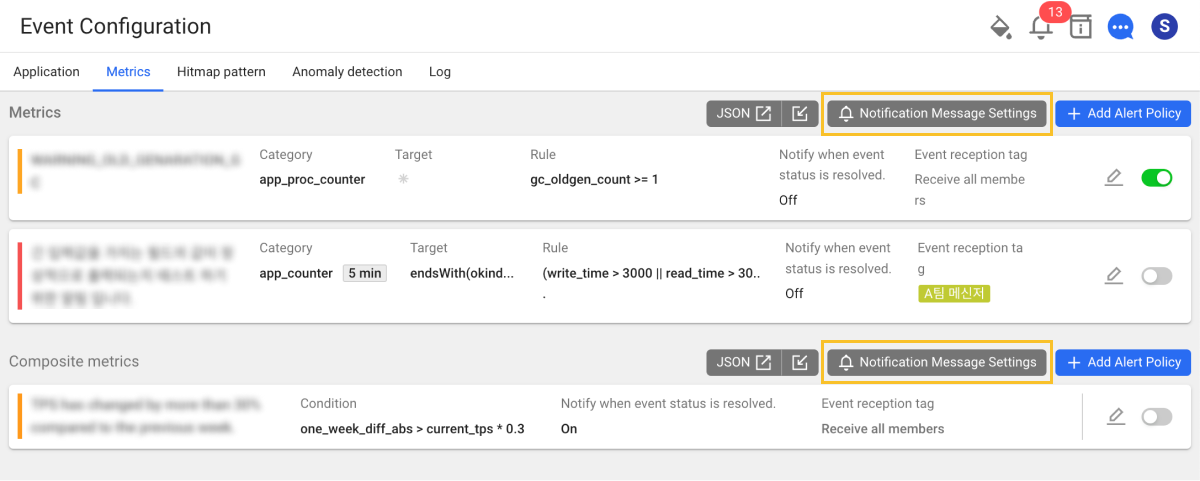
Home > Select Project > Alert > Event Configuration > Select Metrics tab
It provides a customization function to allow to modify the alert messages that are delivered to project members via email or third-party plugins. On the upper right of the screen, select Notification Message Settings. You can hide unnecessary items from the received messages or add any desired content.
-
This function can be applied only to the Metrics and Composite metrics alerts.
-
This function can also be accessed through Select Project > Laboratory > Alert Message.
-
This function can be set by the members with the Alert settings role. For more information, see the following.
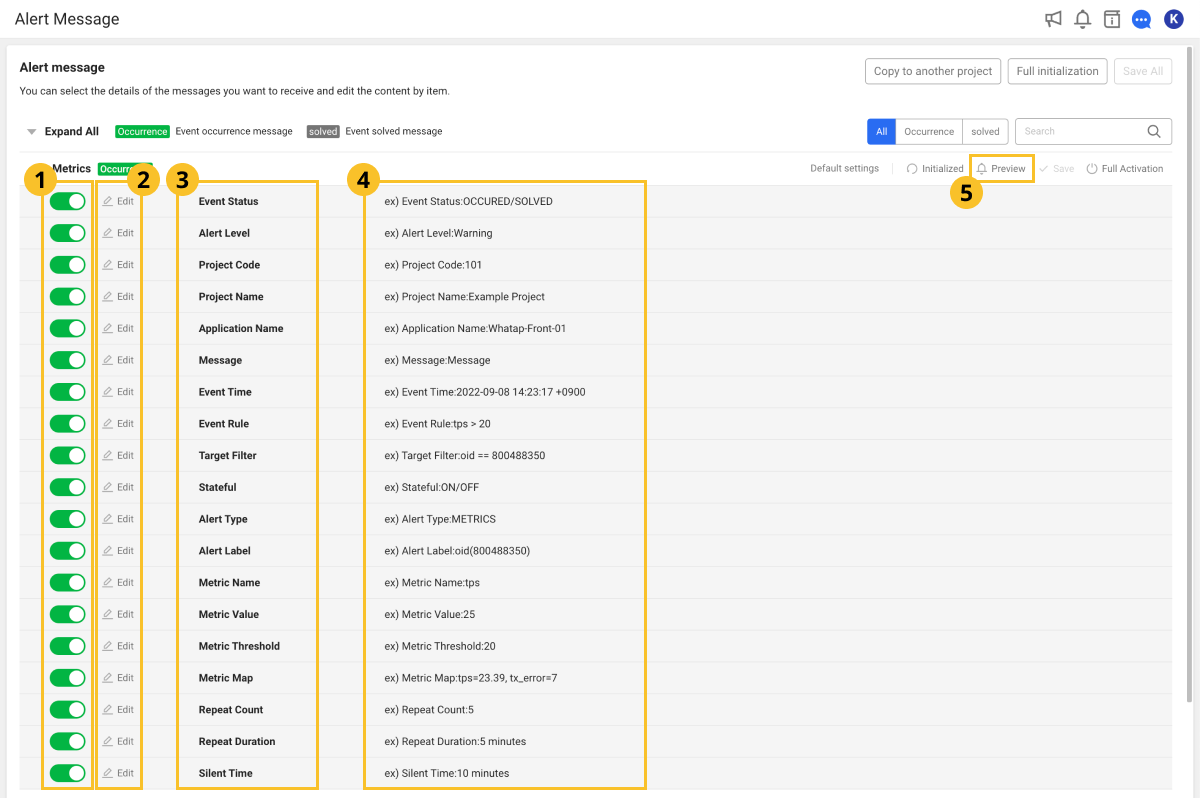
Basic screen guide
-
The notification messages can be classified into Occurrence and Resolved. Occurrence is a notification that is delivered when an event occurs. Resolved is a notification that is delivered when an event has been resolved.
-
To hide the details of a received message, select the
 toggle button to disable it.
 -
To modify the content of the received message, select

 Edit.
Edit. -
The
 area displays the item for details of a received message. The
  area displays the details of a message to receive. If you select the
 Preview, you can preview the content of a received message.
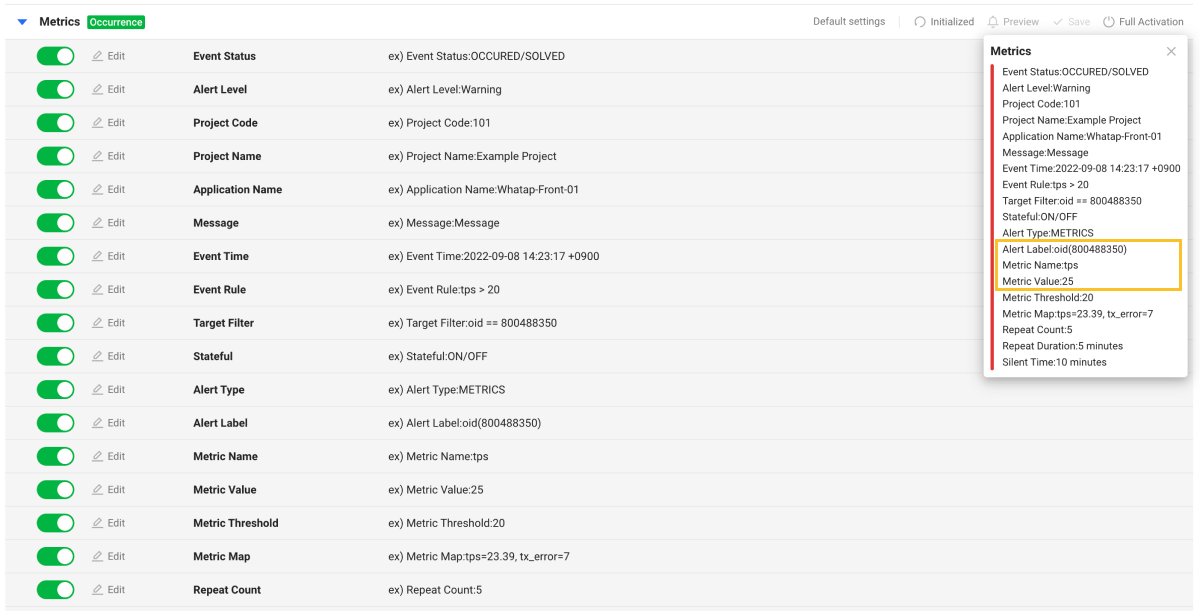
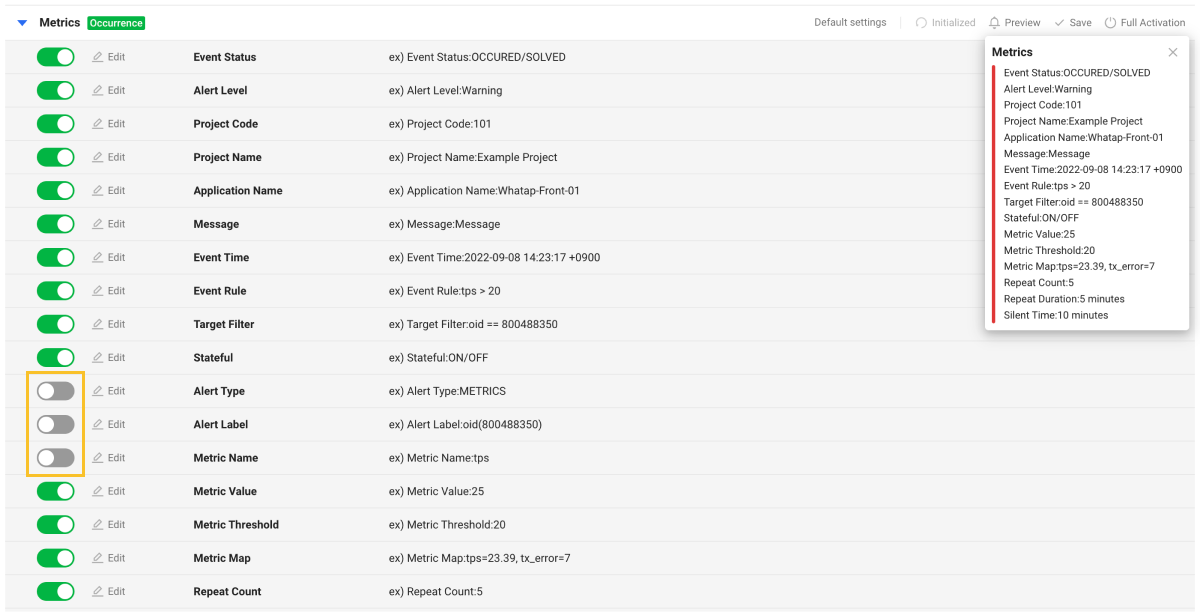
Hiding the incoming message details
You can hide unnecessary items of the incoming messages. You can hide or display the item in incoming messages by selecting the toggle button at the utmost right of each detailed item. By selecting the ![]() Preview, you can preview the content of a received message.
Preview, you can preview the content of a received message.
-
Example of activation of detailed items
-
Example of deactivating details
Select ![]() Save to reflect the changes. Select Save All on the upper right of the screen to reflect all changes in different categories at a time.
Save to reflect the changes. Select Save All on the upper right of the screen to reflect all changes in different categories at a time.
-
To add hidden item details to incoming messages, activate it by selecting the toggle button of the item.
-
Select
 Full Activation to add all detailed items to incoming messages.
Modifying the details
You can add any special content to the detailed items.
-
Select
Edit at the utmost right of each detailed item. -
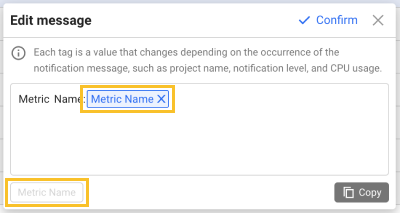
When the Edit message window appears, enter any content to add.
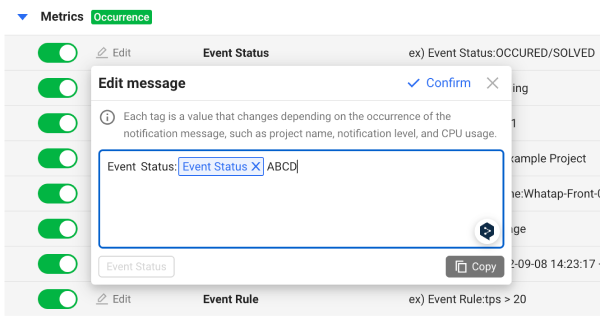
-
Select Confirm.
-
By selecting the
Preview, check the content of a message to receive.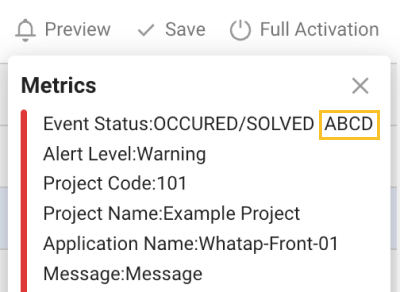
Select ![]() Save to reflect the changes. Select Save All on the upper right of the screen to reflect all changes in different categories at a time.
Save to reflect the changes. Select Save All on the upper right of the screen to reflect all changes in different categories at a time.
In the Edit message window, the text block is a variable that is output depending on the occurred notification. You can reposition the text block by dragging it. If you have deleted the text block, you can add it again by selecting the text block button at the bottom of the window.
Before the content is modified, the message is translated and sent depending on the user's language. After the content is modified, notifications are sent only in the custom format regardless of the language setting.
Copying the settings to other projects
User settings can be copied to other projects.
-
On the upper right of the screen, select Copy to another project.
-
When the Apply project window appears, select a project to copy the settings to. To select all projects, select Select all.
-
Select Apply.
Only the same product type as the current project can be selected.
Initialization
Select ![]() Initialized to reset all changes made by users. Select Full initialization on the upper right of the screen to reflect all changes in different categories at a time. If the confirmation message appears, select Confirm.
Initialized to reset all changes made by users. Select Full initialization on the upper right of the screen to reflect all changes in different categories at a time. If the confirmation message appears, select Confirm.
The initialized configuration cannot be restored.