Management
Agent Update
Updating to the latest version
Home > Select Project > Management > Agent Update

When you update the agent, the latest version of the agent file is automatically downloaded to the agent installation path (agent path) and it is restarted. The update takes about 1 minute. During an update, the download and update success messages appear on the screen step by step. After an update, the agent is automatically changed to the latest version.
-
For the agents that can be updated, the Update button is enabled.
-
To update agents individually, select Update to the right of each agent.
-
To update all agents at a time, select Update all agents to the latest version.
If you move to another menu while updating an agent, you cannot check its progress. While updating an agent, you cannot update another agent at the same time.
In case of update failure
In case of no agent restart
If the agent is not automatically changed to the latest version after display of a successful download message, manually restart the agent. Run the stop.sh and startd.sh batch files sequentially in the agent installation path (agent path).
Manual download of the agent
If downloading is not possible, proceed with agent installation in the following order:
-
Go to Management > Agent Installation.
-
Select Download in 2 of the Install guide section to download the latest version of the agent.
-
Unzip the downloaded file.
-
Upload only the whatap.agent.dbx-
X.Y.Z.jar file to the agent installation path (agent path). -
Run the stop.sh and startd.sh batch files to restart the agent.
Returning to the previous version
-
On the upper right of the screen, select Previous version.
-
The list of downloadable agents appears.
-
Select a desired version.
-
Select Download for the agent to return to the selected version.
-
Download the file to the installation path of the selected agent.
-
Delete the whatap.agent.dbx-
X.Y.Z.jar file of the higher version from the agent installation path. -
Run the stop.sh and startd.sh batch files to restart the agent.
Because the batch file is set to run the highest version of the agent in the installation path, delete the higher version of JAR file to run the previous version of the agent.
Agent deletion
Deleting from the server where the agent have been installed
- Linux
- Windows
Among the Java processes running on the server, the process containing whatap.agent.dbx string is terminated. Run stop.sh in the path where the agent has been installed. Afterwards, delete the agent file and user roles registered in the agent.
Among the Java processes running on the server, find the process running with the jar file of the agent file name and then stop it. If the batch file is running in the foreground, end the batch execution script. Afterwards, delete the agent file and user permission registered in the agent.
Deleting on the service screen
To delete the agent from Whatap Monitoring Service, go to Agent List. Before deleting the agent, terminate the agent process on the server where the agent has been installed.
-
Select a project to delete the agent from the Project List.
-
On the left of the screen, select Management > Agent List.
-
Select
on the utmost right of the agent to delete from Agent List.
-
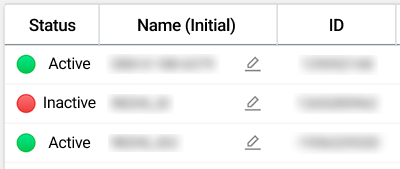
Only inactive agents can be deleted.

-
Depending on the agent version, the delete function may not be supported. Update the agent to the latest version.
Using the V2 service screen
Home > Select Project > Management > Project Management

You can use the Database Monitoring V2 service screen with the functionality of the dashboard menu improved.
-
Go to Management > Project Management.
-
In the Managing project versions section, select V2 as Project version.
-
Select Save.
-
If there is data that cannot be viewed on the screen when inquiring past data, please change the Project version to V1 and inquire with the previous version screen.
-
For compatibility, this function is only available until June 26, 2025.