TCP session/UDP session
Home > Select Project > Analysis > TCP session or UDP session
The session data collected by agents can be used to identify failure points in detail. It provides the filters that allow you to set multiple conditions to efficiently identify data. The identified data can be downloaded in CSV format for other purposes.
Set a desired ![]() time, and then select
time, and then select ![]()
![]() . The table displays the data that meets the set conditions.
. The table displays the data that meets the set conditions.
-
After setting new data search conditions, select
 to output the target data.
 -
This function uses raw data. It provides up to 5 cases per minute based on one agent.
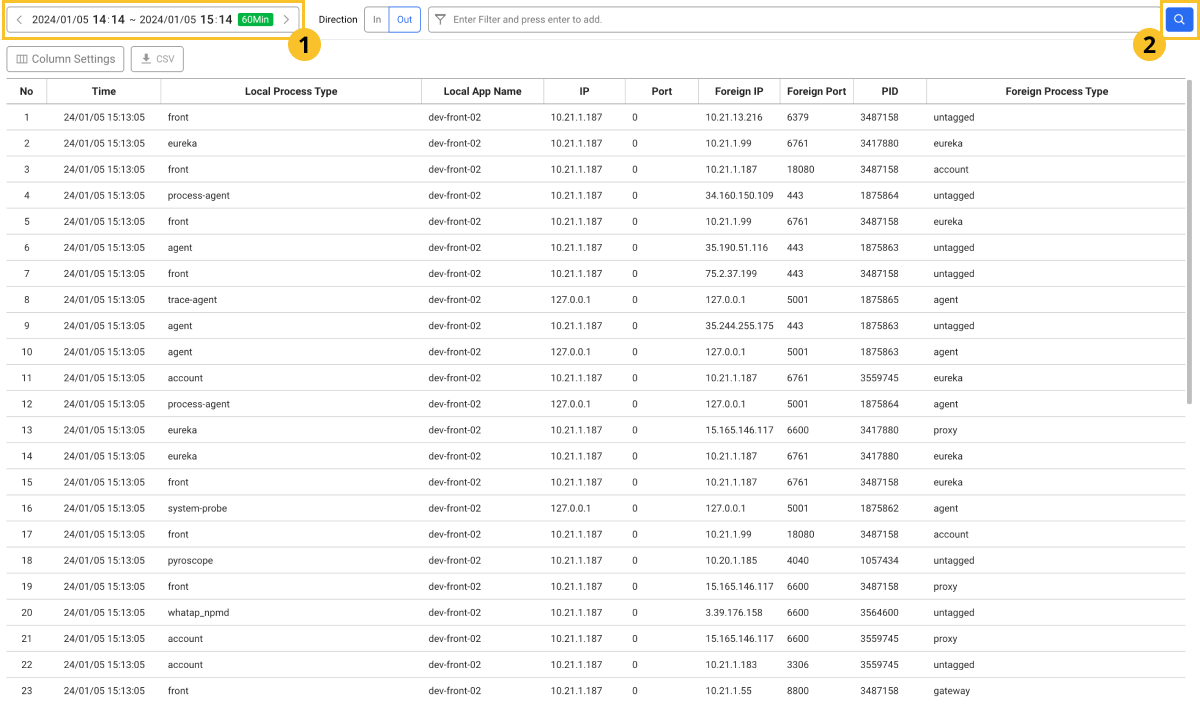
Setting the lookup time
You can see the data by setting a desired time.

-
You can click the green button to select a desired time. It can be set up to 1 hour.
-
By selecting
 or
or  , you can move by the time set on the green button.
 -
If you click the text range for date and time, the option appears to select the date and time.
Setting for the session data search
Configuring the inbound/outbound conditions

Before setting the search conditions, select the following traffic types.
-
In: Inbound traffic
-
Out: Outbound traffic
Setting the filter conditions
You can see the data by setting multiple filter conditions for tag and field values. Conditions are added by the && (and) condition. For example, to search the session data with the ProcessType tag value of "agencyrun" and the Session Count field value greater than 2, set as follows.
![]()
You can filter with the || (or) condition when duplicate tags or field values have been set as follows:
Local Process Type == agencyrun, Local Process Type == dev-yard
-
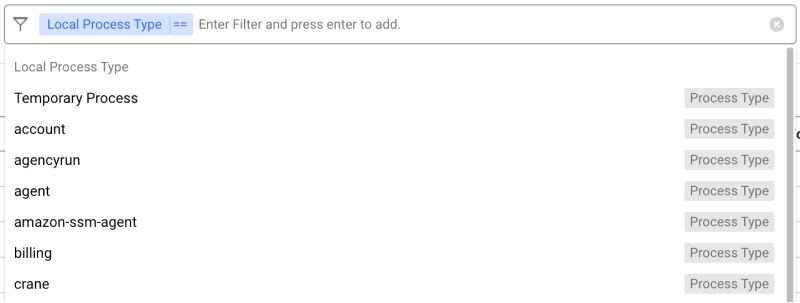
Select the Filter field to see the list of available filters.
You can select the string format (
text) and the numeric format (numeric).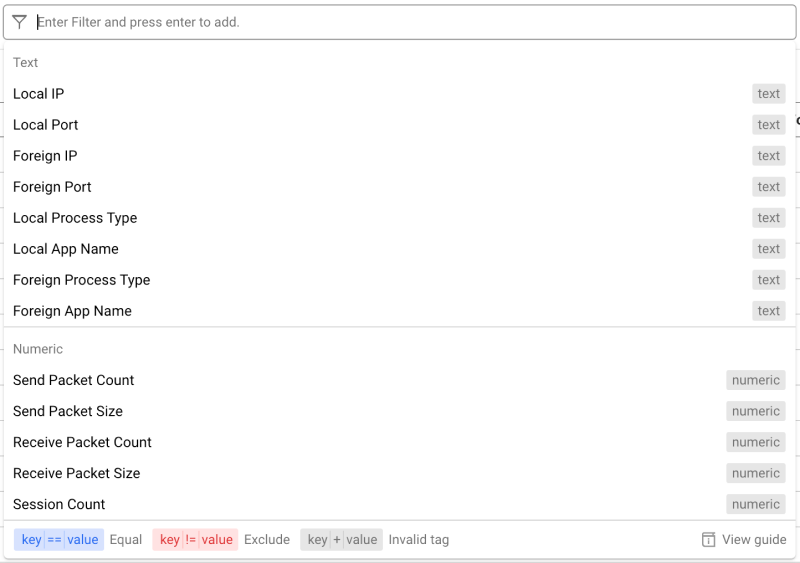
-
Select a filter and then select Operator(
Operator).Depending on the string format and numeric format, the operator you can select may differ.
-
String format

-
Numeric format

-
-
If a string format is selected, the list of available values appears. Select a desired value. In case of a numeric format, enter it directly.
-
Select a desired value or enter a number. To add filters, press Enter and then repeat the above steps.
-
Select
to the right of the Filter field.
Operator types
| Type | Operator | Description |
|---|---|---|
| Text/Numeric | == | Filters the strings that match the value of the selected filter. |
!= | Filters the strings that exclude the value of the selected filter. | |
| Numeric | > | Filters the cases that are greater than the value of the selected filter. |
>= | Filters the cases that are greater than or equal to the value of the selected filter. | |
< | Filters the cases that are less than the value of the selected filter. | |
<= | Filters the cases that are less than or equal to the value of the selected filter. |
Additional options
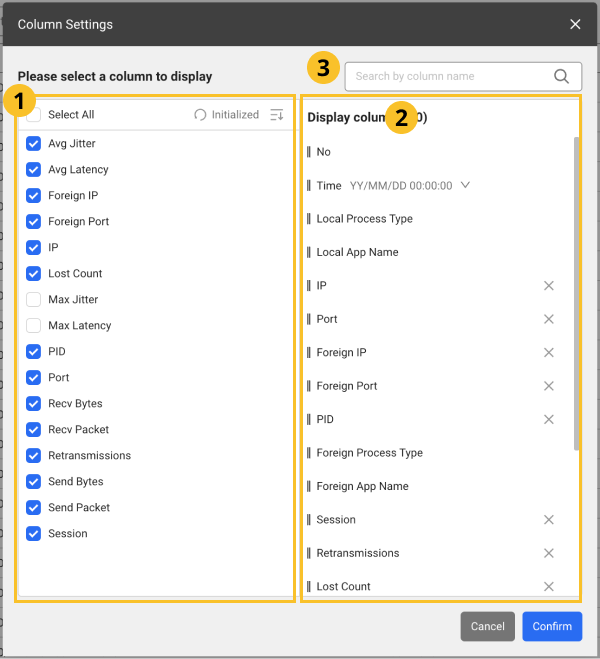
Setting the table columns
You can hide the table header columns or add any of them. You can also change the column order. Select Column Settings.
-
After configuration, select Confirm to apply the settings in the table.
-
In the
 search bar, enter text to search the desired columns. Only the columns that meet the entered text are displayed.
Adding columns
From the ![]() list, select the items to add as table header columns. To select all items, select Select All.
list, select the items to add as table header columns. To select all items, select Select All.
Deleting columns
From the ![]() list, unselect the columns to delete. Alternatively, select
list, unselect the columns to delete. Alternatively, select ![]() on the right of the item to delete from the
on the right of the item to delete from the ![]() list.
list.
Changing the column order
Drag an item to reposition from the ![]() list, and then move it to the desired position.
list, and then move it to the desired position.
Initializing the configuration
To cancel all changes and reset them, select ![]() Initialized.
Initialized.
Downloading the viewed data
To download the data output in the table in CSV format, select ![]() .
.