UI usage guide
The following explains how to use the user interface (UI) elements commonly used in individual menus of the WhaTap monitoring service. Common UI elements are designed to maintain consistency across menus and allow users to quickly and intuitively access desired features. It also provides a consistent and efficient user experience. This guide helps you understand all the features of the WhaTap monitoring service more easily and use them more efficiently.
Time selector
It provides the feature to set dates and times so that users can quickly and accurately analyze the required data. The following guides you to the main features of the time selector and how to use them.
Real-time mode
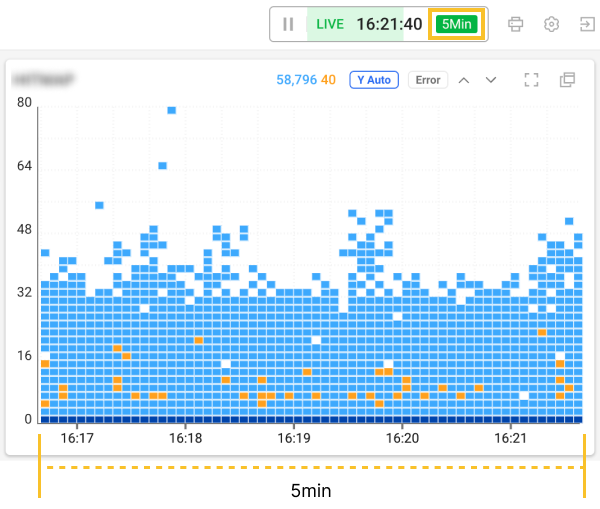
This mode allows you to check the current status by updating the dashboard data in real time. When the current menu is in live mode, the date and time selection tools at the top of the screen display Live.

Real-time mode collects data at an interval of 5 seconds by default and displays it on the screen. If the time selector displays a green icon (e.g. 5 Minutes), the data is updated every 5 seconds during the query.

For example, if the time selector displays 5 Minutes, the charts or data displayed on the screen is continuously updated every 5 seconds for 5 minutes.
-
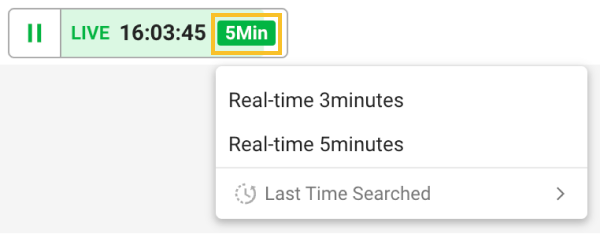
You can change the data query range by selecting the green icon button.

-
If you want to stop real-time mode and view the data at a specific time, select
or the clock area.

Real-time mode may not be supported depending on the menus and features provided.
Period setting mode (past time query)
This mode allows users to set the desired start and end times and then retrieve data for the period. To return to live mode, select .

To view a past time, you can set a desired viewing period by clicking or selecting the date and time.

The maximum query period may differ depending on the provided menus and features, and the real-time mode () may not be supported.
Selecting the specific date and time
You can select the desired date and time to view the data for the period.
Changing with the keyboard
You can click the date or time and then use your keyboard to change the time.

-
Press the left or right arrow keys on your keyboard to move through the step of year, month, day, hour, and minute. You can also navigate by pressing
TABorShift + TABkeys. -
You can change the date or time to your taste by pressing the up or down arrow key on your keyboard.
-
Change the time using your keyboard, and then press
Enteror click outside the time selector. If you pressESCwhile typing, your changes is not applied. -
In Period setting mode, you can change the desired query period by selecting
or
. At this time, the time unit to be changed is based on the value indicated on the green icon.
Changing in the calendar
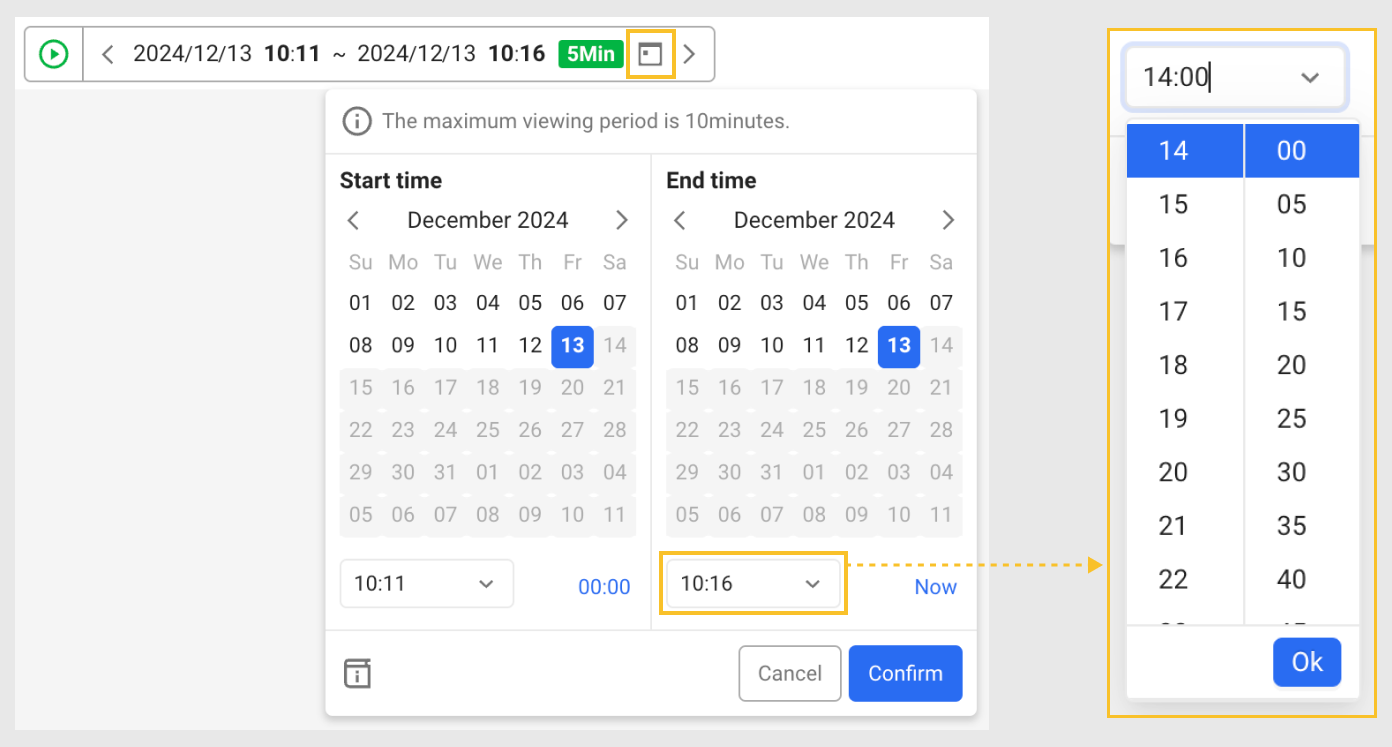
Select on the utmost right of the time selector. A window appears allowing you to select a calendar and time. You can change it by selecting the desired date and time. After changing the date and time, select Confirm.

-
You can change by month by selecting
or
at the top of the calendar.
-
You can select the desired time from the time selection box at the bottom of the calendar. Select a time and then click Confirm.
-
You can change it to the current time by selecting Now.
-
Dates that are grayed out cannot be selected.
-
If you select
, the current document page appears.
-
Maximum query period may differ depending on the menus and features provided.
Selecting a predefined query range
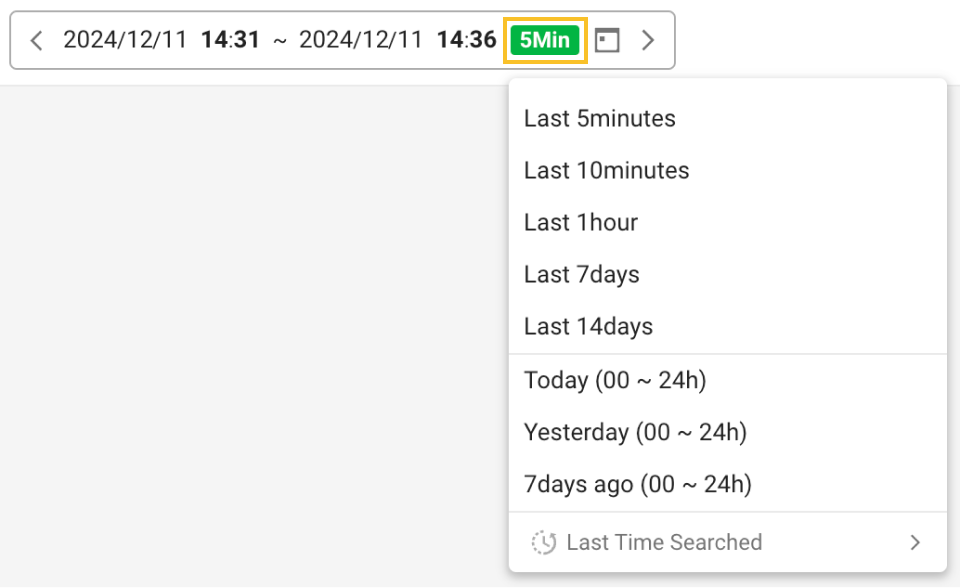
It provides the feature to select a predefined query range to enable quick and efficient data retrieval. Select the green button in the time selector.

The options to select from short term to mid term, or a specific date. Select the desired options and then click or
. You can change the time based on the selected query range unit.
The Last Time Searched option allows you to select a list of recently searched times.
The list of predefined query ranges that can be selected may differ depending on the menus and features provided.
Changing by paste
After copying the time from the time selector, you can paste it after changing the text value to a desired value.

-
In the time selector, press
Ctrl + Cto copy from the year, month, day, and time area. -
Paste it into the text editor and then change it to your desired date and time.
-
Copy the changed date and time in the text editor.
-
Paste by pressing
Ctrl + Vin the time selector.
-
For the date and time format that can be pasted, see the following.
YYYY/MM/DD HH:MM ~ YYYY/MM/DD HH:MMe.g. 2024/12/10 09:00 to 2024/12/11 13:00
-
If the date and time format is incorrect, it is not pasted.