Installation
WhaTap Naver Cloud Monitoring collects metrics periodically through API integration. Select and collect the desired stats in the Naver Cloud Monitoring namespaces that correspond to the services to collect every 5 minutes. When you start monitoring, you can search for user resources in all regions and then start monitoring with a click.
To use the WhaTap monitoring service, after signing up Sign up, create a project. For more information about registration, see the following.
Role
Edit role is required for installation.
Project Creation
Create a project before installing the agent.
-
Log in WhaTap monitoring service.
-
To create a project, on the left of the screen, select All Projects > + Project.
-
Select a product in Select product for installation.
-
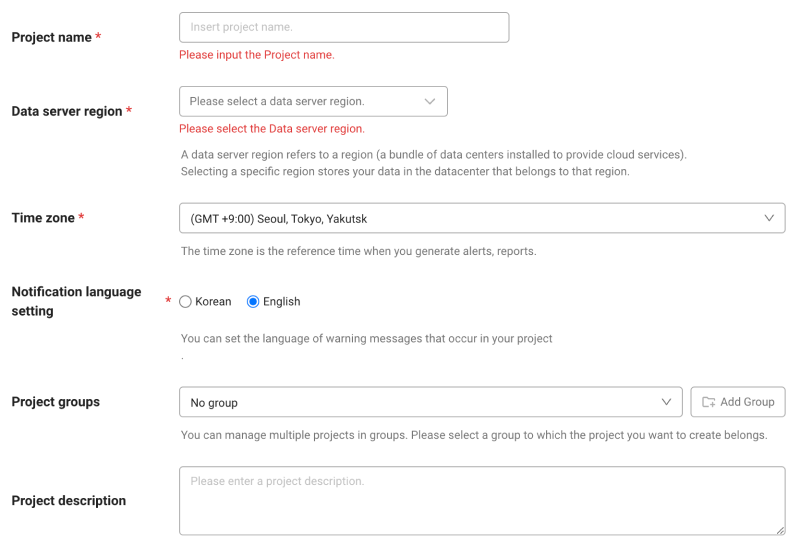
Set items for Project name, Data server region, Time zone, and more in order.
-
In Notification language setting, select the language for alert messages.
-
After all settings are finished, select Creating a project.
-
A Data server region refers to a region (a bundle of data centers installed to provide cloud services). Selecting a specific region stores your data in the datacenter that belongs to that region.
-
Time zone is the reference time for generating alerts and reports.
- To group multiple projects for management, select a group from Project groups or add a group. For more information about grouping, see the following.
- To add a project with an organization selected, Groups of organization must be set.
After a project has been created, the Management > Agent Installation page appears automatically. If the Agent Installation does not appear, select All Projects on the left and then select a newly created project.
Monitoring procedure
- Enter your Naver Cloud authentication data.
- Select values for the Naver Cloud Monitoring namespace and collection cycle.
- Select values for region, metric, and stat.
After installation, extra charge may be incurred in the cloud depending on the usage, separate from the WhaTap fee. For more information about the Cloud service pricing policy before installation, see the following.
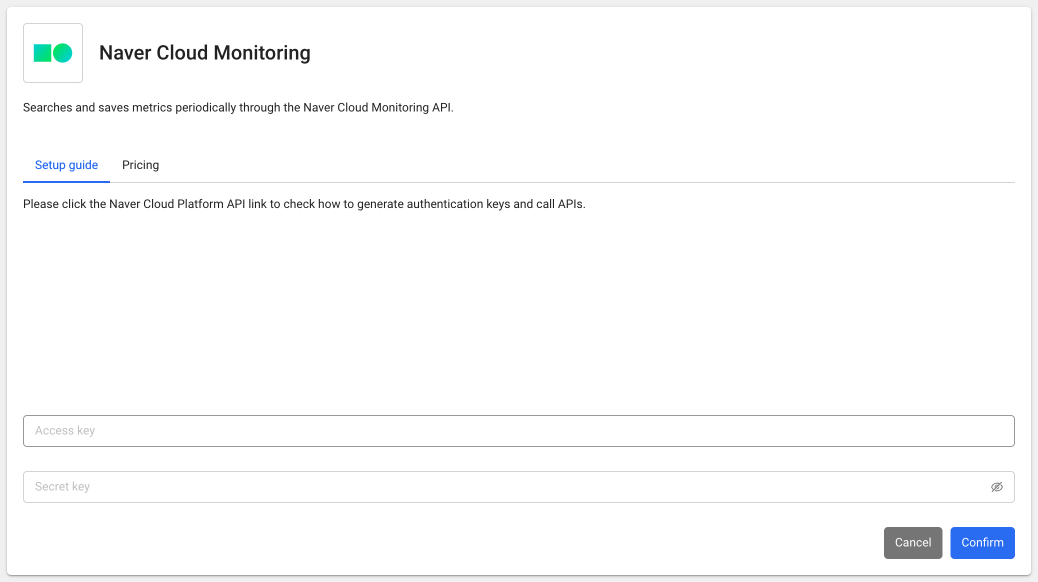
Entry of authentication data
Enter values for AccessKey and Secret.
Selecting the namespace and collection cycle
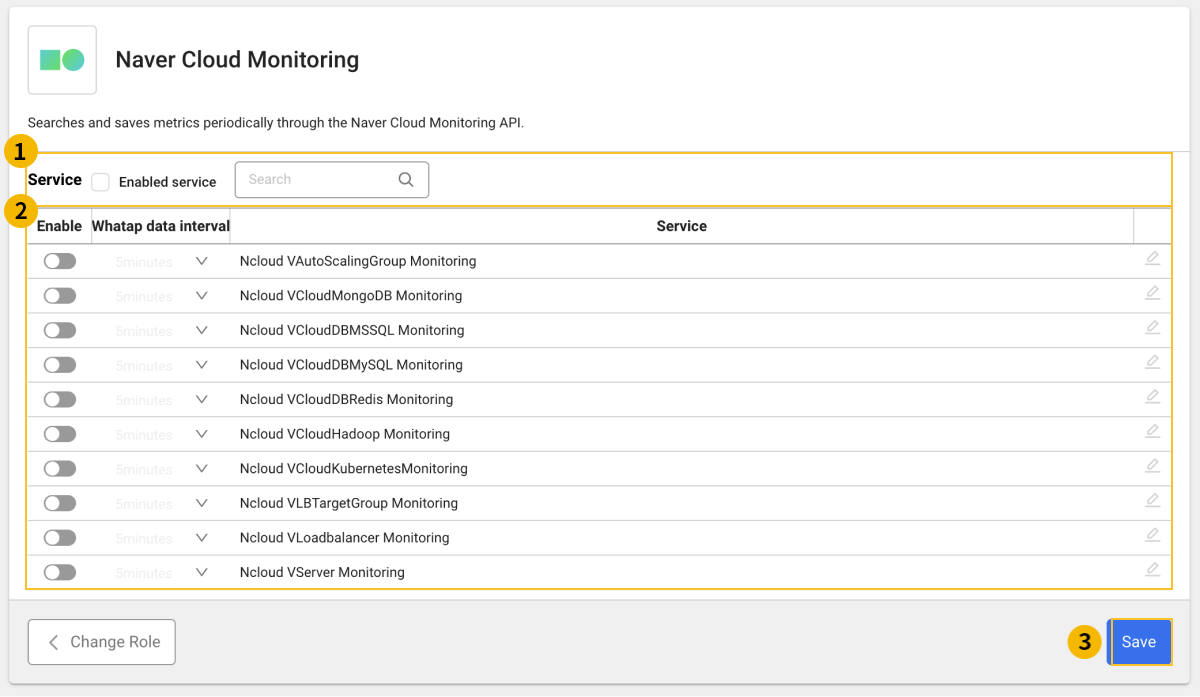
After installation, you can select a namespace and a data collection cycle in Management > Agent Installation.
- If you check in
 Active Service, you can see active namespaces in
  .
. - If you enter a keyword in the field, you can search any namespace in .
- You can set the data collection cycle for each namespace and whether or not to enable data collection.
- Select
 in the Whatap Data Interval column to set the data collection cycle.
 - If you select the toggle button in the Enable column, you can enable data collection
 or disable it
  .
.
- Select
- Select
 Save to save the settings.
Whatap Data Interval
WhaTap collection cycle indicates the cycle in which the cloud service performance metrics are viewed and stored in the WhaTap monitoring system. By default, it is set to collect every 5 minutes, you can increase the collection interval up to 3 hours.
-
1 Minute
-
5 Minutes
-
10 Minutes
-
15 Minutes
-
30Min
-
60 Minutes
-
180 Minutes
Namespace
- Ncloud VAutoScalingGroup Monitoring
- Ncloud VCloudMongoDB Monitoring
- Ncloud VCloudDBMSSQL Monitoring
- Ncloud VCloudDBMySQL Monitoring
- Ncloud VCloudDBRedis Monitoring
- Ncloud VCloudHadoop Monitoring
- Ncloud VCloudKubernetesMonitoring
- Ncloud VLBTargetGroup Monitoring
- Ncloud VLoadbalancer Monitoring
- Ncloud VServer Monitoring
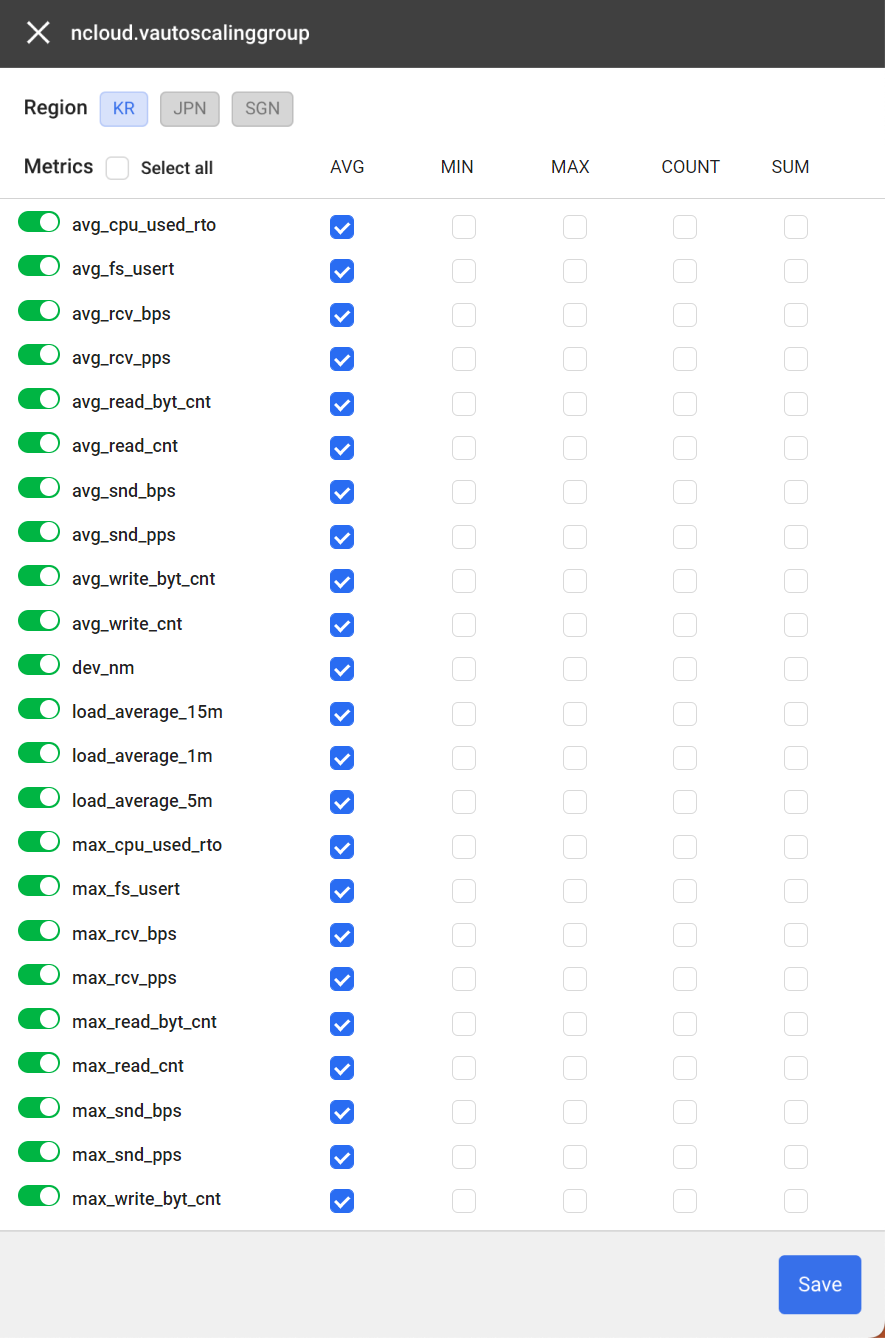
Selecting the region, metric, and stat
When you click ![]() Edit on the right of the namespace checked for collection, you can select values for Region, Metrics, and Stat to collect.
Edit on the right of the namespace checked for collection, you can select values for Region, Metrics, and Stat to collect.
Service initialization and deactivation of data collection
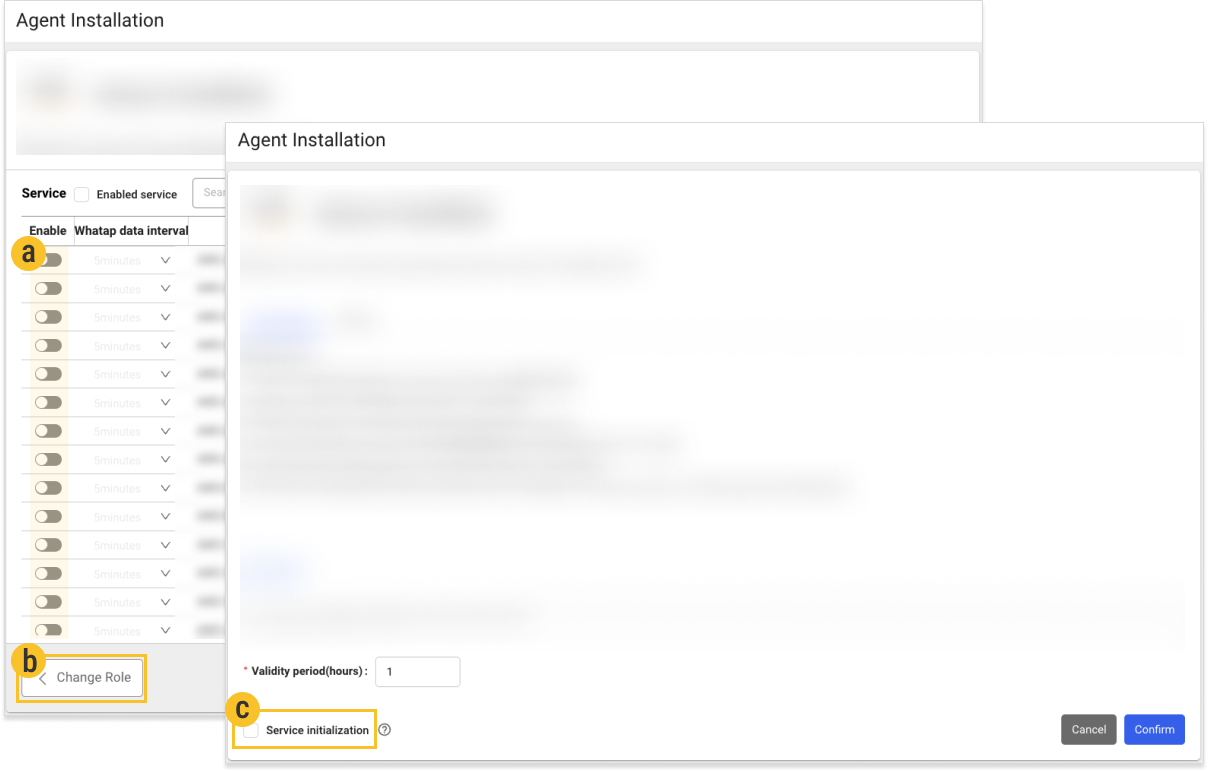
-
 When the collection toggle is disabled, the data collection is stopped.
 -
 Select Change Role to disable all services that are collecting metrics by selecting
  Service initialization on the Agent installation screen.
 -
To completely avoid incurring costs, go to Naver Cloud Account Management > Authentication Key Management, and then disable API Authentication Key Management.