Agent CONFIG.
The Whatap agent writes the necessary settings for each agent in whatap.conf. The agent locates and loads the configuration file through the environment variables.
If any separate setting, the agent is set to find whatap.conf under the (whatap.agent-X.Y.Z.jar) directory. It checks whether whatap.conf has been changed every 5 seconds and then reloads the file.
For user convenience, Whatap Monitoring Service also provides the agent configuration function.
Default settings
whatap.home=.
whatap.config=whatap.conf
-
whatap.home: Enter the path of whatap.agent.jar as the default. -
whatap.config: It is recommended to enter only the file name. You can also specify the relative path.
In order for the agent to collect and transfer data to the server, the access key and server address must have been set.
license=x220g160hgd29-x3qpff0garcus7-z4p0kao58un11a
whatap.server.host=10.10.0.1
When the WhaTap agent is run for the first time, you can check which jar file has been used as the agent and from which path whatap.conf has been loaded, as the following.

Server connection and data transmission
The WhaTap agent is connected to the server address that has been set in whatap.conf.
whatap.server.host=10.10.1.1
whatap.server.port=6600 # default value
- When the TCP session is connected, it receives the communication key by using the
license. When a wronglicenseis set, the server terminates the session. - If the TCP connection is terminated repeatedly, check for any firewall problem or check whether the
licensevalue is correct. - When a TCP session is connected, data is transferred through the secure communication channel based on the private key received from the server.
Management of the configuration file for multiple applications
When running multiple applications on one server, to separately control the configuration files for each application, change the name of whatap.conf and then add the JVM options to your startup script.
-Dwhatap.config=whatap_Aservice.conf
-Dwhatap.config=whatap_Bservice.conf
The whatap.conf configuration file must be located in the ${WHATAP_HOME} path.
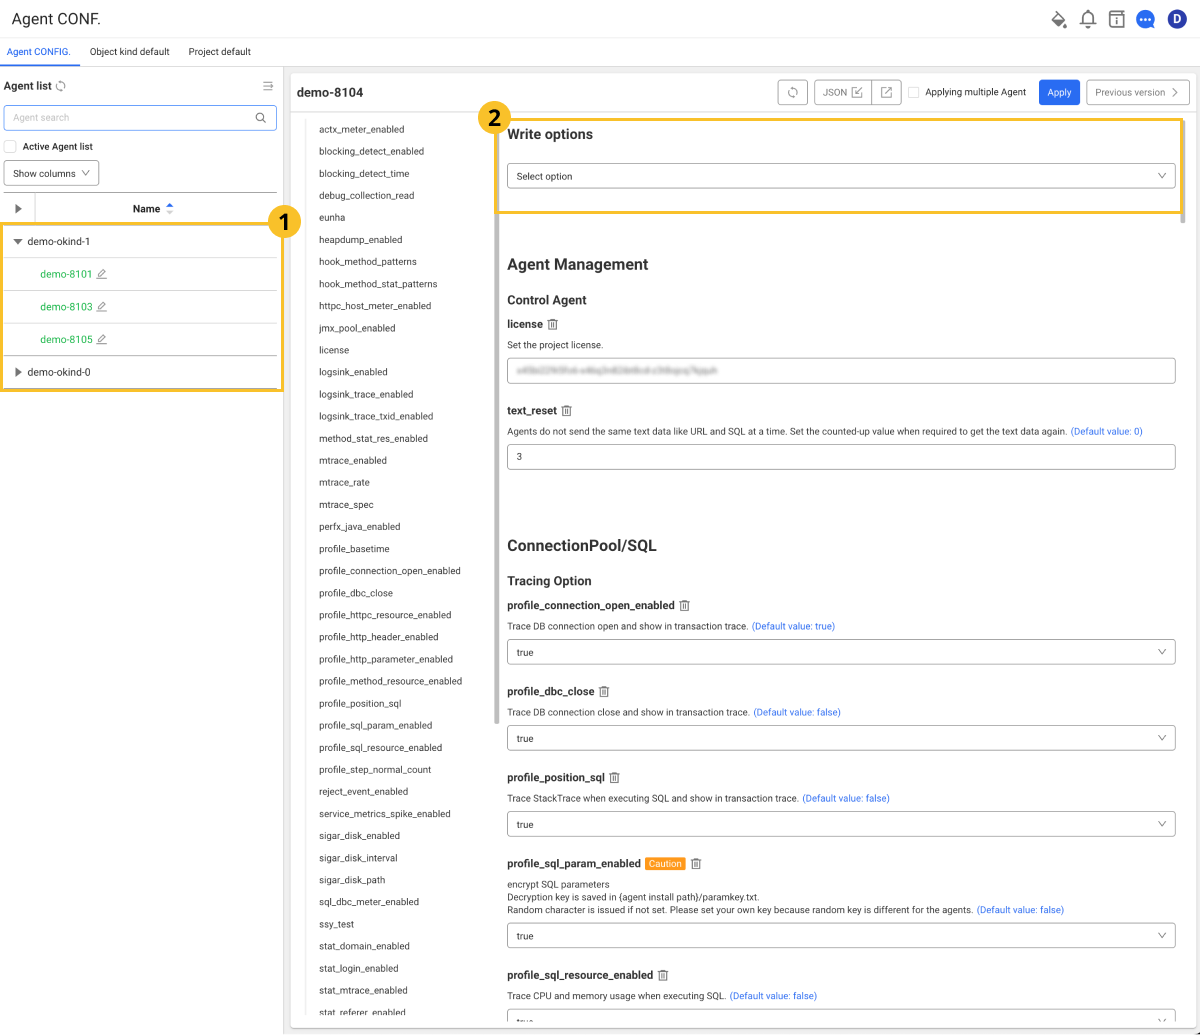
Configuring the agent on the service screen
Home > Select Project > Management > Agent CONF.
You can add, modify, or delete agent configuration options in the Whatap Monitoring Service without directly modifying the whatap.conf file that is in the monitoring target server. You can also click Download configuration file to download the whatap.conf file.
-
This function is only available to the members with Edit role. The members without Edit role can only view the settings.
-
You can set the options in the following format.
- Select
trueorfalsefor a boolean value. - For numeric values, you can enter only number.
- When entering or modifying a text (string) value, check the option description in detail.
- Select
-
You cannot select any option that is not editable. (e.g.
license) -
You may restart each agent depending on the option that has been added, modified, or deleted.
-
The option keys that can be applied may differ depending on the application type and agent version.
Adding options
-
In Agent List, select the
 agent to add options to.
 -
In
 Write options, select options to add.
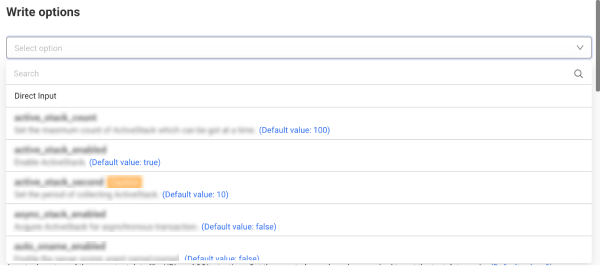
- You can find options to add in Search. Enter text to filter matching options.
- If you select Direct Input, you can enter the option keys and values.
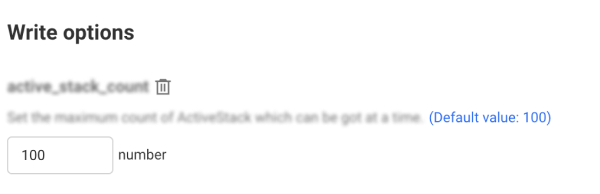
-
Check the description and default value of the selected option key, and then enter the setting.
- To cancel the selected option, select
 .
. - To add new options, select Add and then repeat Step 2.
- To cancel the selected option, select
-
After adding the desired options, select Apply on the upper right of the screen.
Apply the selected options and settings to agents.
- To initialize the content in modification, select
 on the upper right of the screen.
 - If you select Apply without entering options, the options are deleted.
- The added options cannot be selected in the option list.
- The option keys that can be applied may differ depending on the application type and agent version.
- The example images may differ depending on the application type and agent version.
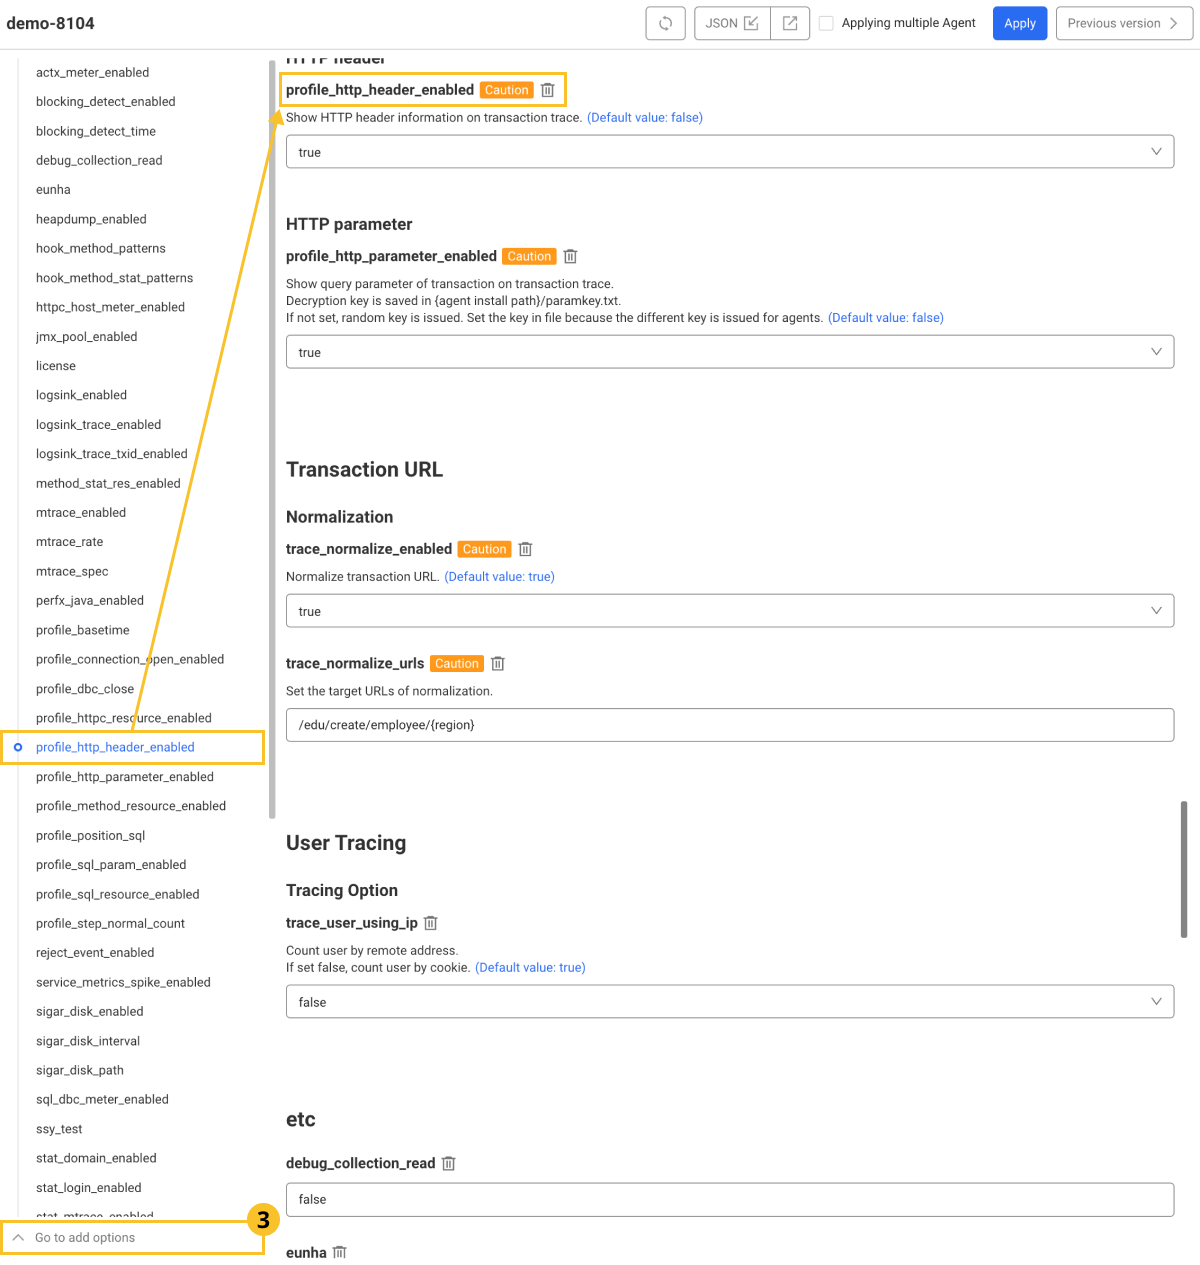
Modifying or deleting options
-
Scroll up or down the screen, or select a desired option to edit or delete from the option list on the left.
-
Select or edit the desired value for the option to change. To delete an option, select
. -
Select Apply to apply your changes.
-
If you want to move to the top of the screen, select
 Go to add options.
 -
If you select Apply without entering options, the options are deleted.
Applying to multiple agents simultaneously
Changed options can be applied simultaneously to multiple agents that belong to a project.
-
If you check Applying multiple Agent on the upper right of the screen, checkboxes are created for each option.
-
Select the checkboxes of the options you want to apply simultaneously. You can select multiple items.
-
On the upper right of the screen, select Apply.
-
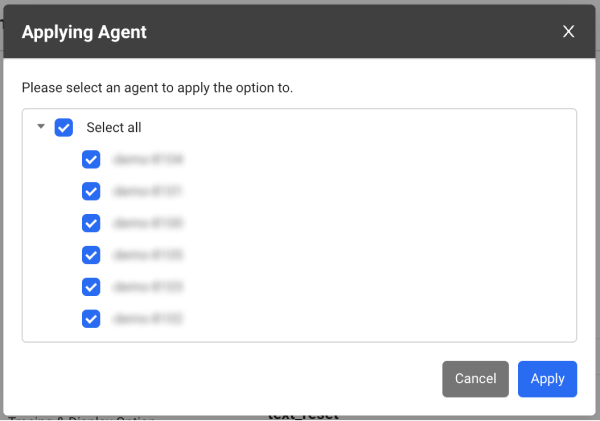
If the Applying Agent window appears, select an agent to apply the changed options to. To select all, select Select all.
-
Select Apply.
Setting the default values of the agent
To avoid the hassle of repeatedly applying the settings when adding a new agent to a project, you can create and apply default settings for each project and task.
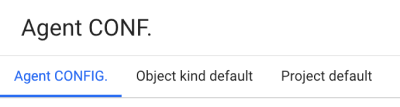
Object kind default: In the whatap.conf file, the options can be commonly applied to the agents classified as
whatap.okind, and the applied options can be checked.Project default: The options can be commonly applied to all agents belonging to the project, and the applied options can be checked.
-
If you select Object kind default or Project default tab and then apply the options, it is useful to commonly manage agents.
-
The application order of options is as follows: Object kind default, Project default, and Agent CONFIG..
- If the value of option b is 1000 in Project default and it is 2000 in Object kind default, the option value set in Object kind default, 2000 takes precedence.
- If the value of option b is null in Project default and it is 2000 in Object kind default, the option value set in Object kind default takes precedence.
Sharing the agent settings
Agent settings can be saved as a json file, and the file can be loaded and applied to other agents.
-
In the Agent list, select an agent to export the settings to a json file.
-
On the upper right of the screen, select
 .
. -
Download the json file.
-
In Agent list, select other agents.
-
On the upper right of the screen, select
 .
.
Check the agent settings fetched from the json file.
Guide to the agent configuration options
The following links provide descriptions of the options that can be set. To identify monitoring targets, the method how to set a unique identifier for the application server is provided. It is required to identify application servers among the monitoring target systems. You can see automatic naming based on the data such as server type and IP. Otherwise, you can manually set the agent name through the whatap.conf file or JVM options. The following explains how to fine-tune the agent functionality for monitoring Java application servers. It includes the functions such as enabling/disabling agents, tracing transactions and performance counters, and collecting OS data. You can see various setting options that control each function. The following explains how the Java agent collects CPU, memory, and disk usage. Java's JMX library is basically used. If necessary, you can see how to collect performance metrics through Linux's proc directory or oshi and sigar libraries. The following explains how to configure the network to transmit the data collected by Java agents from the application servers to the server. The major configuration options are the collection server host, port, timeout value, network transfer size, and data transfer queue size, which are important to ensure the agent's efficient data management and reliable server communication. The following guides you to the performance options for Java agents. You can check the maximum number of transactions that can be processed simultaneously and the initial size of the buffer that stores transaction data. This plays an important role in optimizing the system load and resource usage. The following explains how to manage log data generated in the Java application environment through the agent. It includes the configuration of the path and name of the log file, retention period setting, log monitoring, and how to enable custom log tracing. It also provides various options for log management to help manage system logs efficiently. The following explains how to set an agent to trace and analyze performance data for each transaction within Java applications. It evaluates the application performance by tracing transaction requests, response time, and resource usage. The following provides various options for Java agents to handle the database and collect SQL performance data. They can trace various DB connection pools such as DBCP, Hikari, and Tomcat and record SQL execution details. Additionally, it provides information collection options for performance optimization, such as recording SQL parameters and tracing DB connection leaks. The following explains how to set options for the Java agent to collect and analyze the data related to HTTP outbound calls and API calls. It provides various options for detailed monitoring, such as SLOW_HTTPC error handling, CPU and memory usage tracing, stack trace records upon calls, and URL normalization. This allows developers to efficiently manage external dependencies for applications and identify performance issues. The plugin option provided by the Java agent provides a way for you to inject desired code into the trace data or add additional information before and after execution of the method. It includes the options for setting where to run specific code at method entry/exit time and how to configure a class to monitor custom pools. More specific usages are provided through actual plug-in application cases, and it guides you to various configuration examples and API usage that can increase the flexibility and precision for monitoring. The following explains how to count the number of users connected to the Java web application server through agent settings. It includes the setting whether to enable real-time user counting, setting of the cookie limit to count users, the method how to count users based on the IP address or specific HTTP header values, and setting of HTTP headers to trace client IPs. This guide describes the agent options that configure the traffic throttling options for Java application servers. The following includes the features to limit the maximum number of concurrent requests for applications and control service accesses based on specific users or URLs. It provides various options such as sending custom messages, setting URL redirections, and enabling event notifications, to ensure stability of applications under overload situations. The following explains how to configure notifications for various events that occur in the application server through Java agents. It includes the options to configure event notifications for transaction recursive calls, denial of service, HTTPC connection errors, excess of heap and disk usage, CPU usage threshold violation, DB connection duplicate allocations, and exceptions. For each event, you can make detailed adjustments such as release interval, release status, and threshold settings. The following describes the Java agent options that set Apdex scores to measure the user satisfaction. Apdex metrics help you objectively evaluate the application's performance and improve user experience. The following guides you to the agent options for various statistics collections to monitor Java applications. It includes performance counter extensions, transaction collection by domain, multi-server transaction dependency analysis, statistics collection by login type and referral, and more. You can also check the maximum record limit settings for collecting SQLs, HTTP calls, error statistics, and user agent information. The following guides you to the agent configuration options that use the data collected by the Java agent to create a topology map for applications. You can visualize and analyze the topology of your system through various metrics, such as transaction callers, database connection information, HTTPC outbound information, and active transaction status. The following guides you to the agent configuration options that detect errors during transactions in Java applications and display stack traces. It collects errors from various areas such as transactions, methods, SQLs, HTTP calls, and SOCKET calls, and includes methods how to set the error stack length, title length, and such. It helps you improve error handling through agent settings and support more efficient error diagnosis for applications. The following guides you to additional agent configuration options that can help you tailor the level of monitoring for Java applications. It includes collection of SQL parameters, collection of HTTP parameters and header data, extraction of user IPs, selection of user count tracing method, SAP function tracking, and the like. Through these options, more granular data collection and analysis can be tailored, especially in security-critical environments. The following explains how to trace activities of asynchronous applications through the Java agent settings. It includes the methods for collecting CompletableFuture methods and hooking those methods into user applications. It provides the options to add to the whatap.conf file along with configuration examples, to help enhance performance monitoring for asynchronous calls.Agent name identification
Control of agent functions
Collection of CPU/memory/disk usage
Agent communication settings
Agent performance
Agent log configuration
Transactions
DB, SQL
HTTPC, API Call
Script plug-in
User count
Load balancing
Agent notification
Apdex
Statistic
Topology map
Transaction error stack
Additional options
Asynchronous trace