Quick installation and troubleshooting
During installation of agent
For agent installation, see the following from project creation to monitoring activation. After installation of the agent, IIS restarts.
In case of use of Windows Server 2008 or .NET version lower than 4.6.1
For the WhaTap .NET agent, it is recommended to use Windows Server 2012 or .NET Framework 4.6.1 or later. If you are using a lower version, use the installer from the following link.
After installation of agent
Delivery of errors and logs
-
When an error occurs, send us captured images of the error or the corresponding text.
-
Send us the agent's log file. The log file can be found in the following path. If there is no corresponding error, the folder may not exist.
-
C:\Program Files\WhaTap .NET\logs
-
C:\ProgramData\WhaTap
-
In case of no collection of data
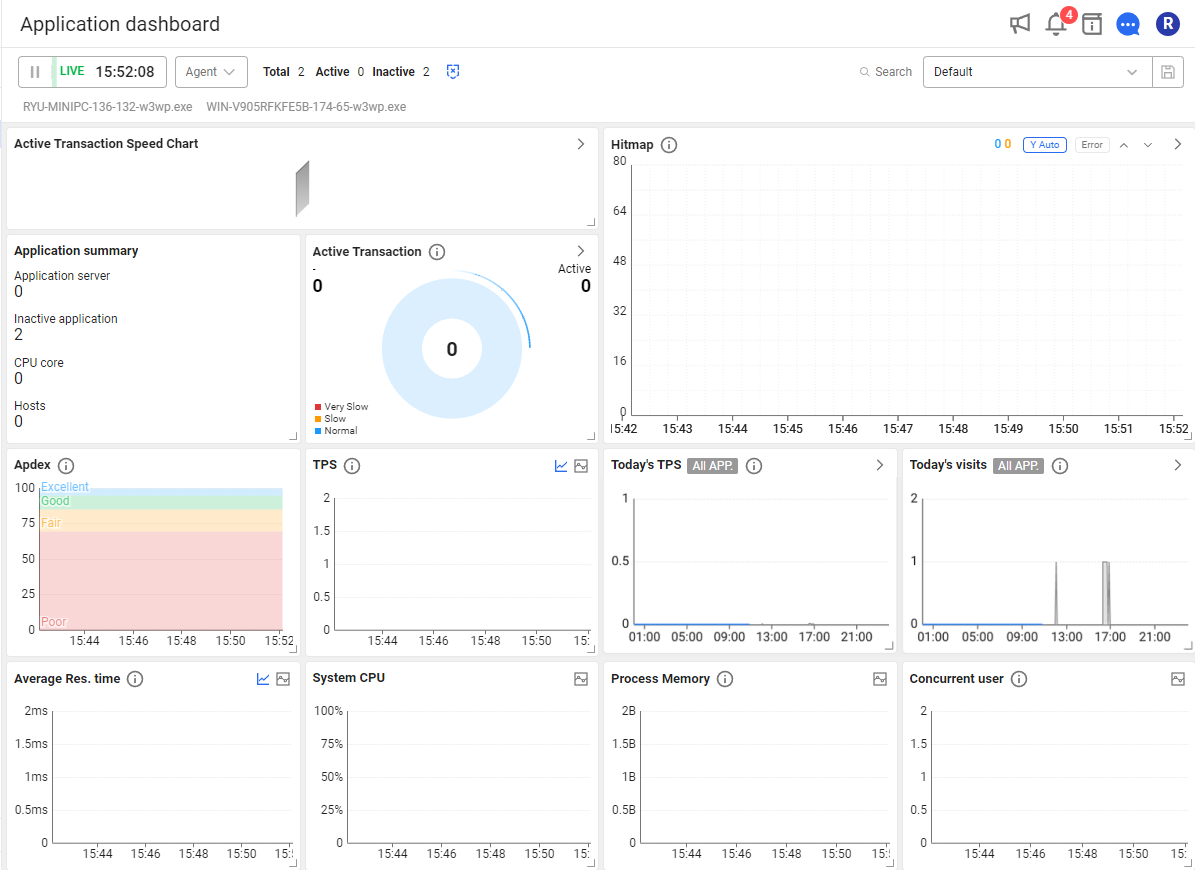
If all data is not collected properly in Application Dashboard as shown in the example, check the following.
-
Make sure the access key and collection server information are entered correctly.
-
Check the firewall configuration of the server. The outbound 6600 port must be open.
In case of no collection of hitmap data
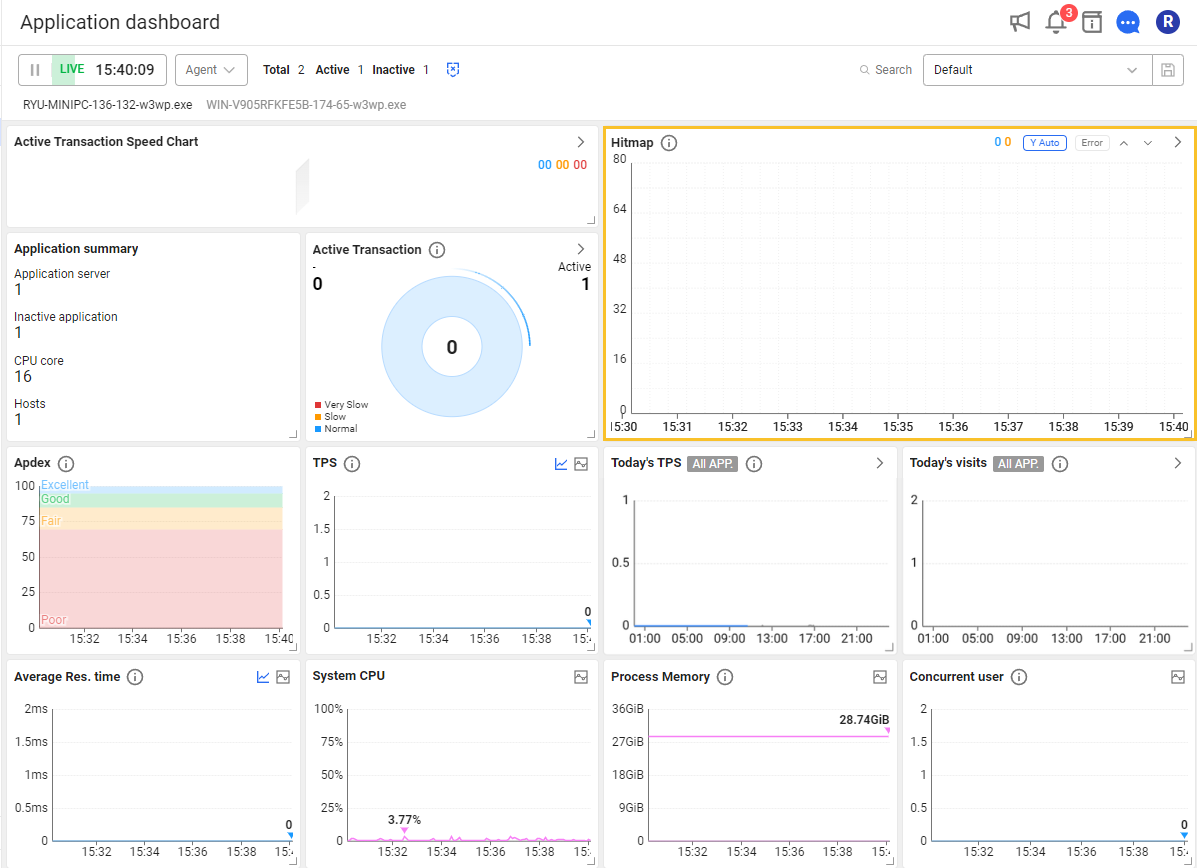
If the hitmaps are not collected properly as shown in the example, check whether the target application is in the supported environment. For the supported environment, see the following.
In case it is in the supported environment or difficult to check the environment
-
Send us the web.config file of the target application.
-
Send us the project file (*.csproj) of the target application.
-
You can use AI to check if the environment supports the .NET agent through the following link.
Monitoring the WCF and officially unsupported libraries
To monitor the libraries that are not officially supported by the WhaTap .NET agent, such as Windows Communication Foundation (WCF), see the following instructions.
Extensive settings may cause excessive traffic.
Configuration options
-
webservice_method_enabled Boolean
Default
falseIf the value is set to
true, the web services can be traced.NoteAfter changing the option, you must restart IIS for the changes to take effect.
-
webservice_method_prefix String
Enter the namespace and class name where the method to trace has been defined in the value.
-
When you enter the name of the class to which the method belongs, all public methods within the class become the targets to trace.
-
The methods that meet the conditions are not using the web service, they become the targets to trace. This option is designed for the WCF and web service monitoring but can be used for various purposes.
NoteAfter changing the option, you must restart IIS for the changes to take effect.
-
-
webservice_method_prefix_realtime Boolean
.NET Agent v2.3.6 or laterDefault
falseIf you set the value to
true, the target ofwebservice_method_prefixis processed in real time as the previous. -
webservice_method_timeout Milliseconds
Default
5000If the monitored method is not completed within a specific time, a timeout is automatically set. The default value is 5 seconds (
5000ms).
Usage examples
whatap.conf modification
license= ## access key
whatap.server.host=15.165.146.117
whatap.server.port=6600
app_process_name=w3wp.exe
tag_counter_enabled=true
perfcounter.enabled=true
app_name= ## application name
OID= ## agent ID

webservice_method_enabled=true
webservice_method_prefix=Whatap.Service.Controller, Whatap.DotNet.Examples.Service1
webservice_method_timeout=10000
-
Because you specified the call path of the namespace-included method to be traced with the
webservice_method_prefixoption, the start and end of the function is treated as transactions if one of the following occurs:-
Whatap.Service.Controller -
Whatap.DotNet.Examples.Service1
-
-
Because
webservice_method_timeouthas been set to 10000 ms, transactions that take more than 10 seconds are automatically terminated.
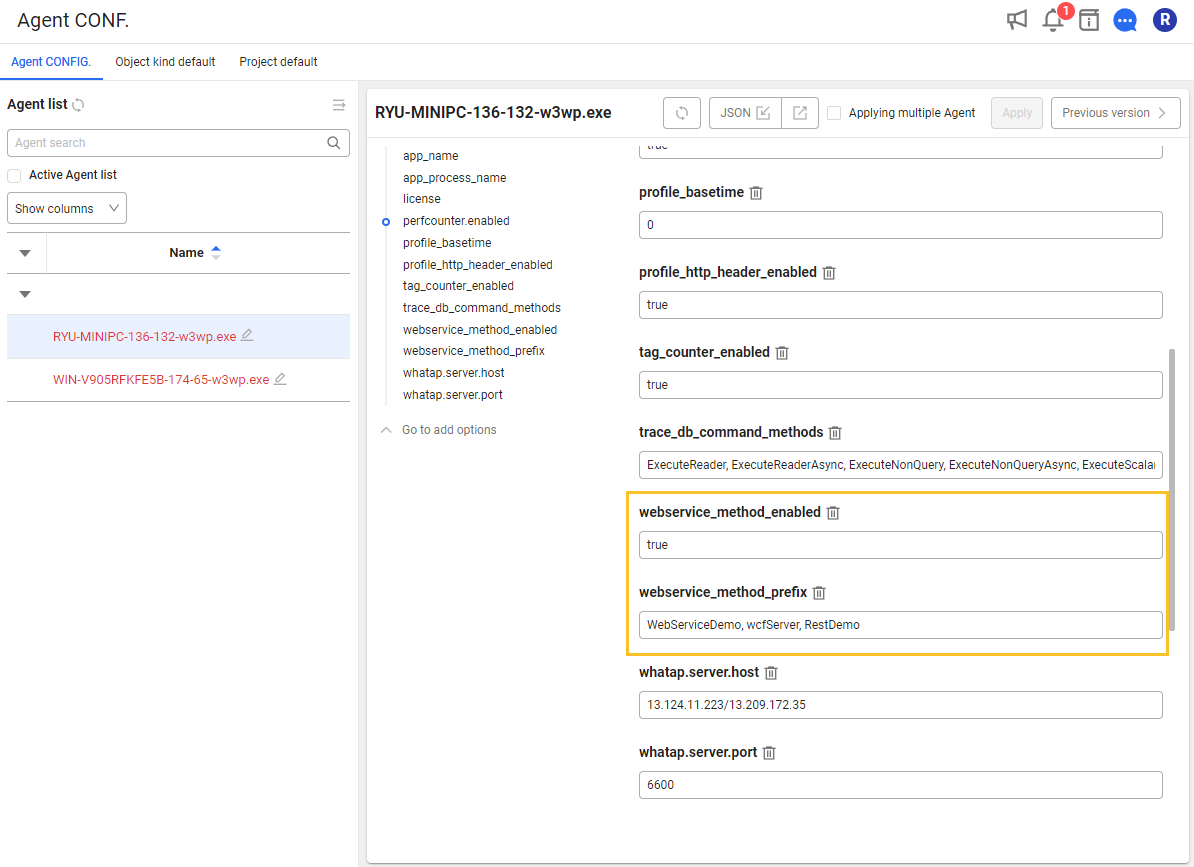
The settings can be changed through the Management > Agent CONFIG. menu as follows:
Finding the namespace and class name
In case of WCF
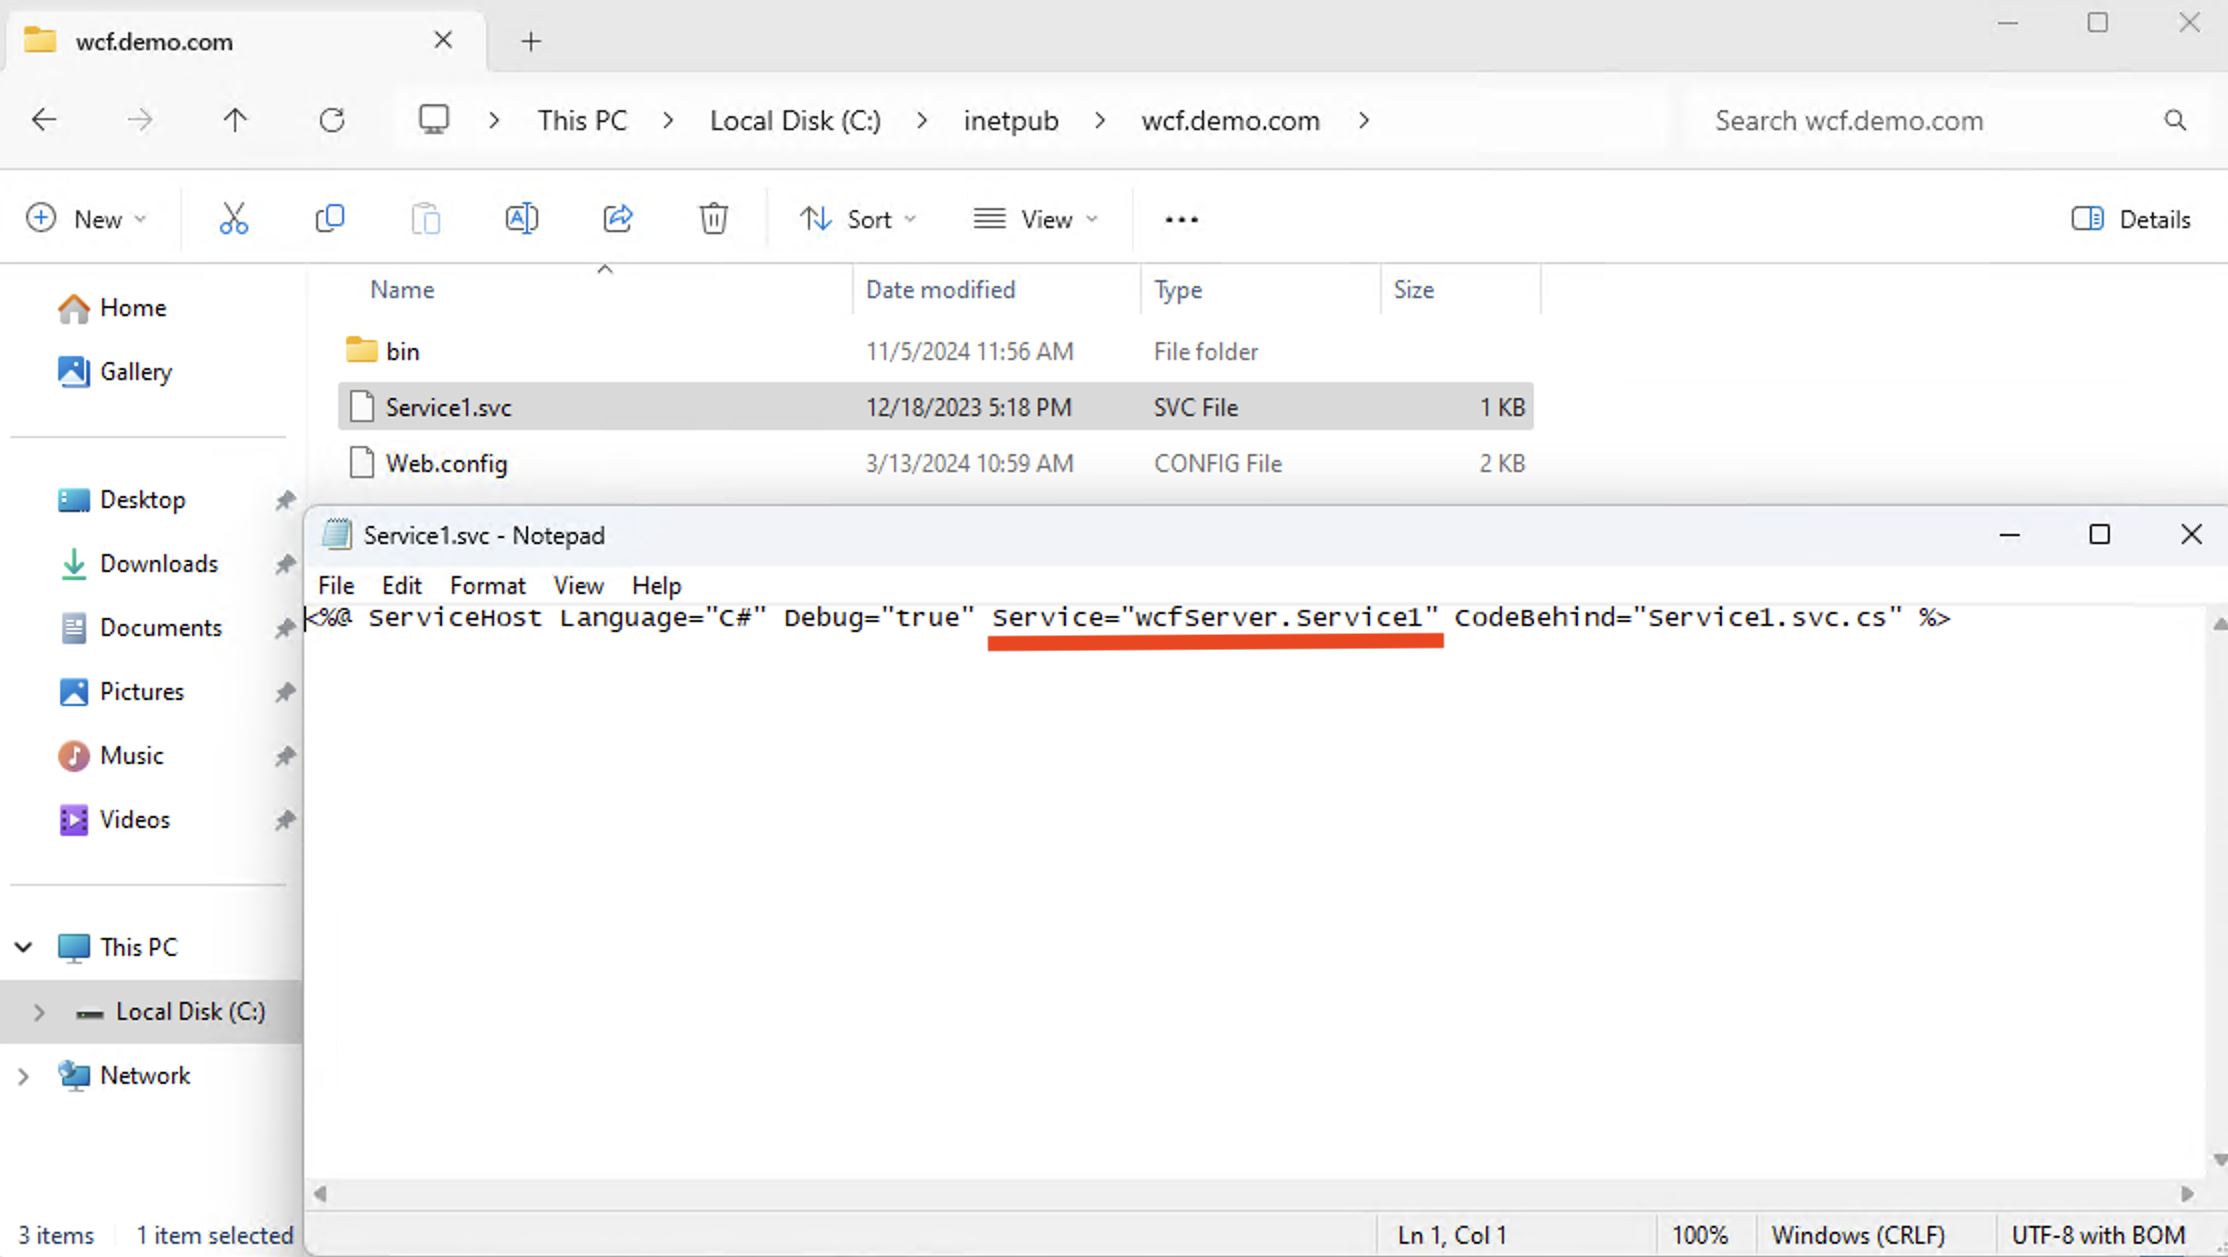
For WCF, the *.svc files are searched in the deployment folder. Open this file with a text editor such as Notepad and then check the value specified in the Service field. This value needs to be added to webservice_method_prefix.
In case of Web Service
For web services, the *.asmx files are searched in the deployment folder. Open this file with Notepad and then check the value specified in the Class field. This value needs to be added to webservice_method_prefix.
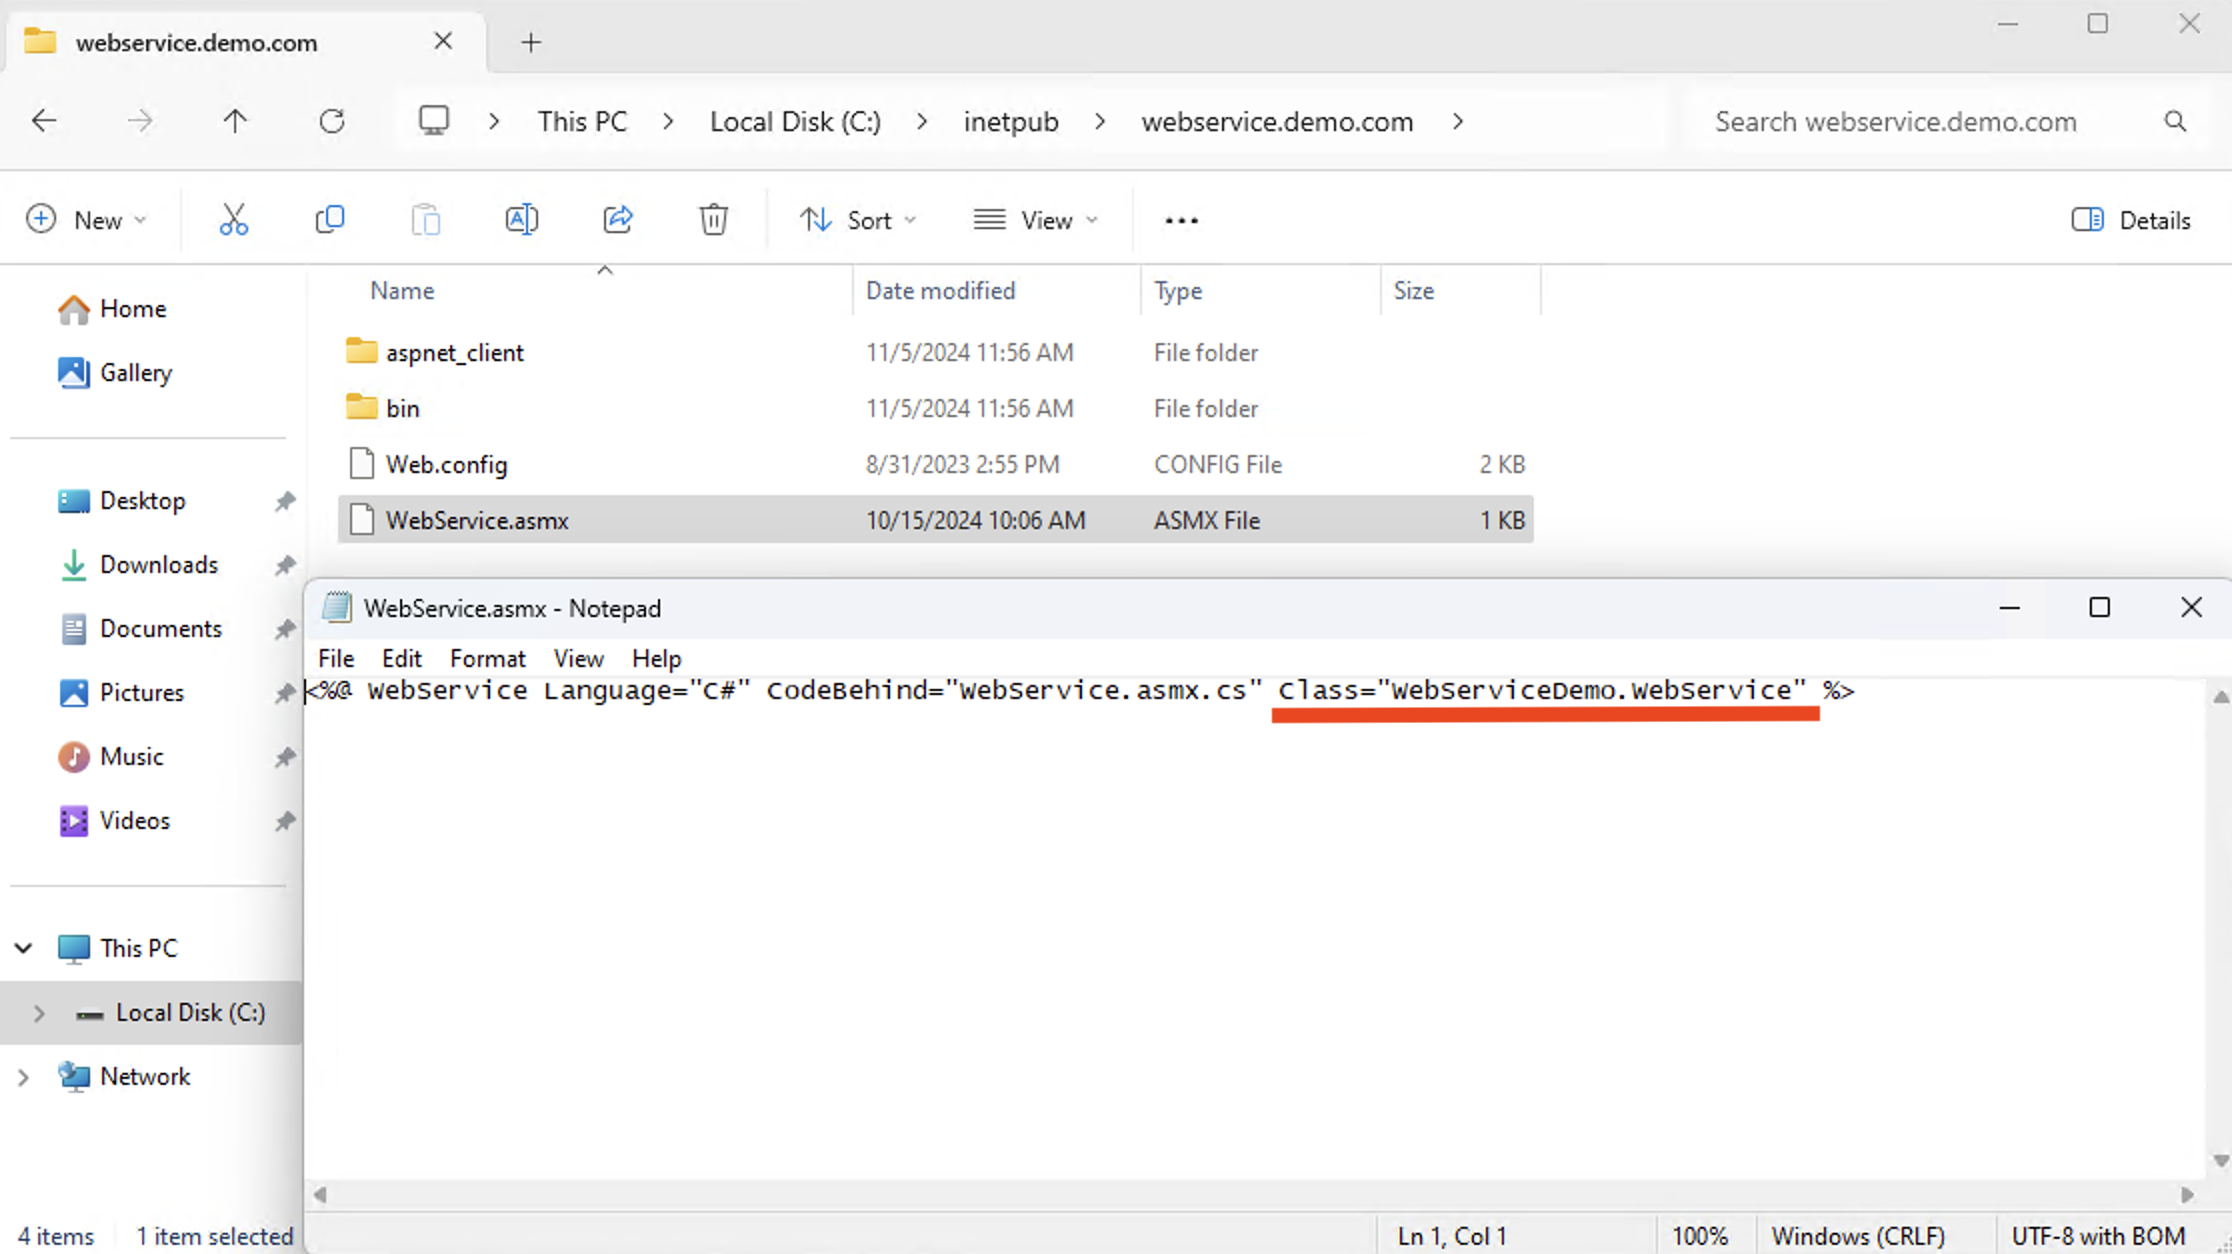
Configuration example
See the following configuration example.
webservice_method_enabled=true
webservice_method_prefix=wcfServer.Service1, WebServiceDemo.WebService
In case transactions are captured but step are not displayed or too few
If transactions are detected but steps are not visible or insufficient, you can expand the monitoring scope via Method hook. See the following configuration example. The configuration example allows you to display the items excluded from the monitoring scope in the basic library as step information.
hook_methods_enabled=true
hook_methods_prefix=System.Net.Http.HttpClient., System.Net.WebRequest., System.Data., System.Net.Http.,
# hook_methods_ignores=get,set
-
hook_methods_prefix: In the step, it displays all methods that start with the specified value. -
hook_methods_ignores: It excludes all methods starting with the specified value from monitoring.