Error tracing
Home > Select Project > Analysis > Error Tracking
Browser Monitoring collects the browser front-end errors. It includes the error messages and error stack information, browser, OS, device, and page URL.
Exploring a error
You can see browser errors that have occurred over time.
![]()
-
In
 , set a desired time. It can be set up to 1 day in advance.
 -
Select one of the
 bar graphs displayed on the chart.
From the
 time list, you can select the time detail when an error occurred among the data collected every 10 minutes.
 -
Below the chart, you can see a list of browser errors that occurred at the selected time.
If you type specific keywords in the
 input field, the matching text is highlighted in the list.
 -
To check the details of the error, select

 on the utmost left.
For more information on how to use the Time option, see the following.
Checking the error information details
The browser error has the following information:
-
errorType: Indicates the error type. There are source errors including AJAX errors, console errors, and syntax errors.
-
pageLocation: URL of the page visited by the user.
-
title: Title of the page visited by the user.
-
browser: Browser type of the user.
-
borwserVer: Browser version of the user.
-
os: OS type of the user device.
-
osVer: OS version of the user device.
-
device: Type of the user device.
-
host: Domain name of the visited server.
-
userAgent:
User-Agentstring received from the user browser. -
message: Error message.
-
stack: Error stack information. The error stack basically contains obfuscated file names, lines, and columns.
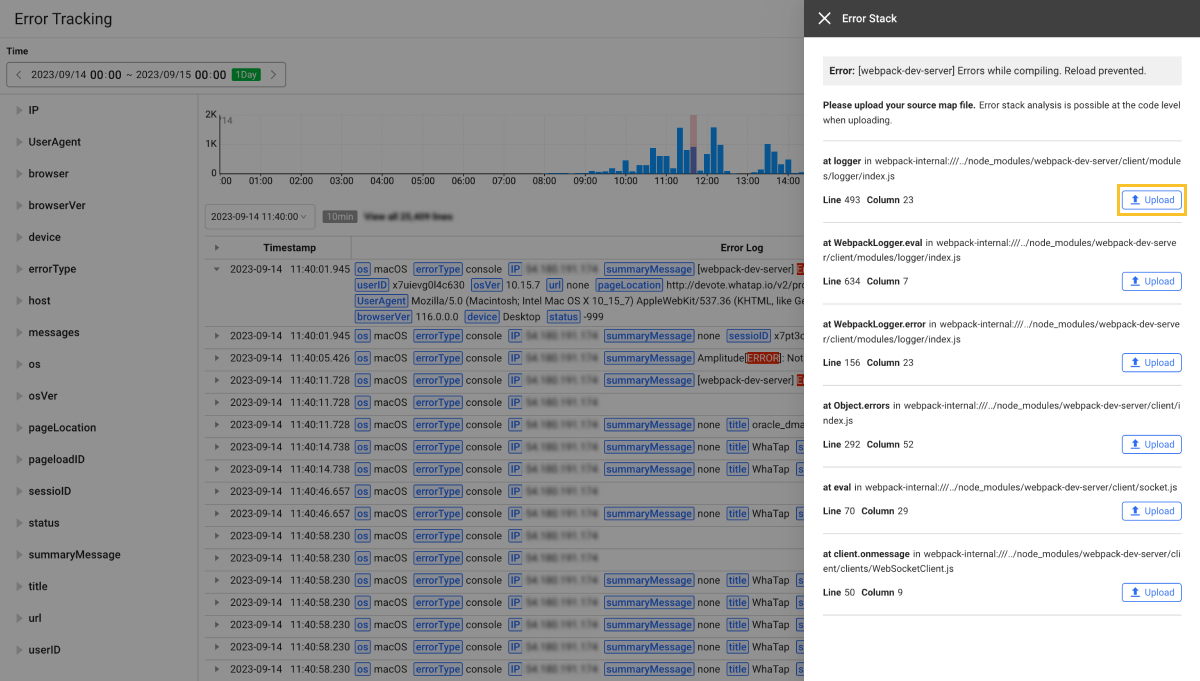
Source map uploading and error code provision
If the released frontend code is obfuscated or compressed, it is difficult to provide the collected browser error's stack information at an actual code level. You can access the file or code line that caused the browser error through the source-map built at the time of releasing the frontend code.
-
In the Exception stack column, select Analysis.

-
If the window in which the error stack information for the selected error log is displayed appears, select Upload.
-
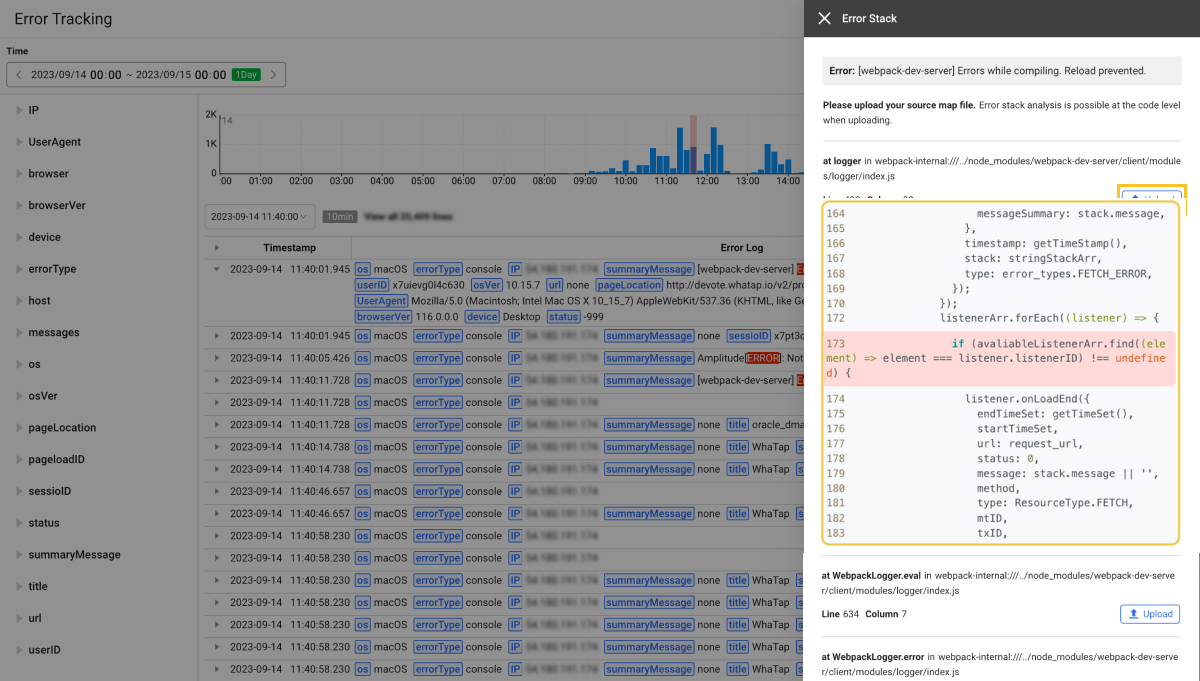
Load the source map for the code stack.
By comparing obfuscated stack information with JavaScript source map, you can see the code where the actual error occurred.
Searching by filter the error data
You can search the errors by filtering based on the data included in the browser errors.
![]()
-
In the left panel of the screen, select a desired browser error item for filtering.
-
If the sub list appears, select a desired item. You can also search if the list is too many.
It displays a list of browser errors corresponding to the selected item.
Table Column Settings
Displaying or hiding the table columns
You can display or hide column header items in the browser error list table.
-
Select
 on the upper right of the table.
 -
If the Column settings window appears, select or unselect the desired item in the list on the left.
You can also hide columns by selecting the
 button in the list on the right.
 -
After all settings are finished, select Confirm.
The set content is applied to the table.
Reordering the table columns
You can change the order of column headers in the browser error list table.
-
Select
on the upper right of the table. -
When the Column settings window appears, change the order by dragging the desired items from the list on the right.
-
After all settings are finished, select Confirm.
The set content is applied to the table.
Setting to display the table content
You can set the content displayed in the browser error list. It can be used when too much information appears so it is difficult to see, or it is required to add necessary information.
-
Select
 on the upper right of the table.
 -
When the Log view detail setting window appears, set the desired options.
-
Select content or Tag to determine whether or not to display the log content.
-
Tag management: Tags are displayed in the log in the order of addition. The order of tags can be changed by dragging. Disabled tags do not appear in the logs.
-
-
After all settings are finished, select
.
The set content is applied to the table.
For more information about Log view detail setting, see the following.