Okta Integration
This guide explains how to set up SSO login to the WhaTap monitoring service using Okta as the Identity Provider (IdP). You can log in to the WhaTap service with your Okta account and use the service within the assigned permissions.
- An Okta account is required for WhaTap login integration.
- For more information about Okta, see the Okta official website.
Prerequisites
Complete the following before starting the Okta integration.
- Generate an SSO key from WhaTap: Copy the EntityID and Sign-On URL values.
Creating an Okta app and configuring SAML
-
Log in to the Okta Admin page.
-
Go to Applications > Applications.
-
Click the Create App Integration button.
-
Select SAML 2.0 and then click Next.
-
Enter the App name and then click Next.
-
Enter the SAML Settings > General items.
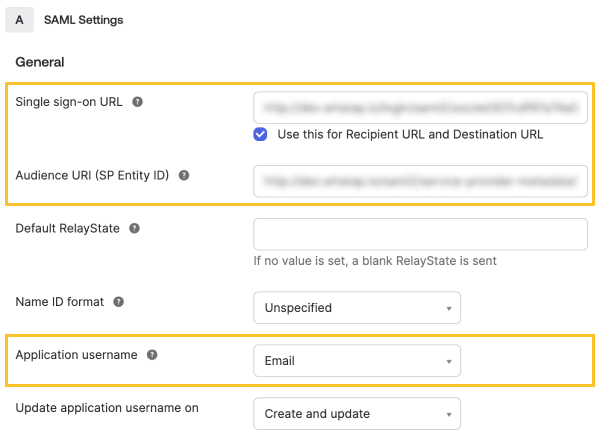
- Single sign-on URL: Enter the Sign-On URL value copied from WhaTap.
- Audience URI (SP Entity ID): Enter the EntityID value copied from WhaTap.
- Application username: Select Email.
-
In Attribute Statements, enter
emailin Name and select user.email in Value.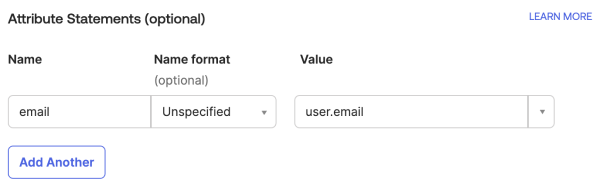
-
Click Next.
-
Select This is an internal app that we have created and then click Finish.
Copying Okta metadata
-
On the Okta Admin page, go to Applications > Applications.
-
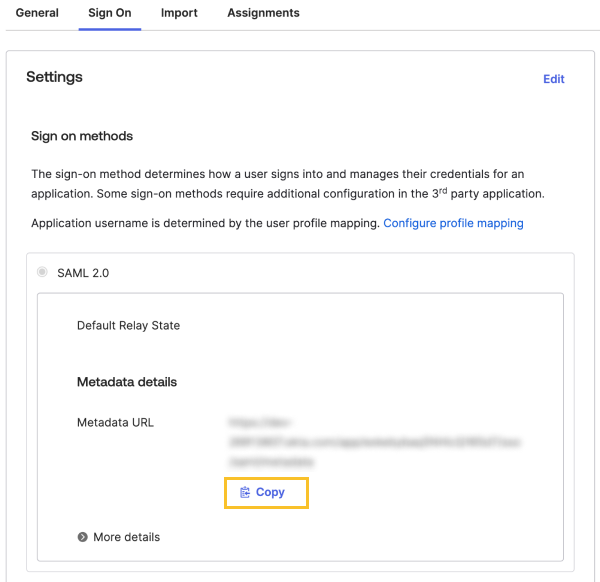
Select the Sign On tab.
-
In Metadata URL, click the Copy button.
-
Register the copied metadata URL following the WhaTap External IdP registration procedure.
Assigning users
-
On the Okta Admin page, go to Applications > Applications.
-
Select the previously created application.
-
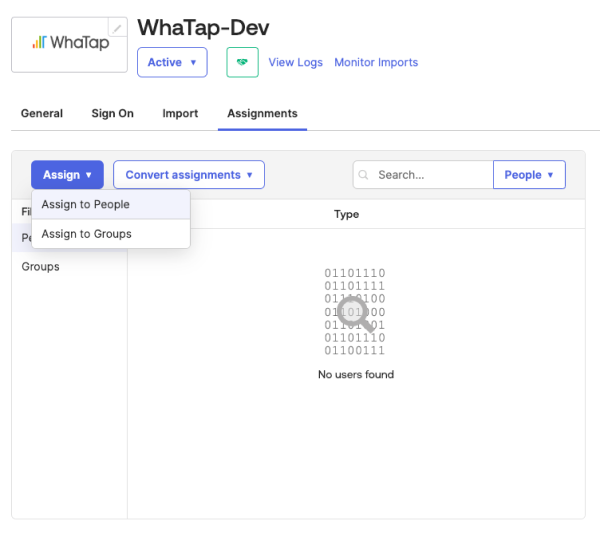
Select the Assignments tab.
-
Click the Assign button and then select Assign to People or Assign to Groups.
-
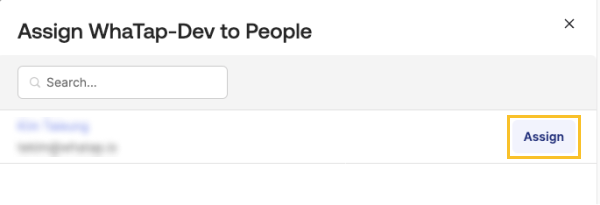
Select the users to assign and click the Assign button.
-
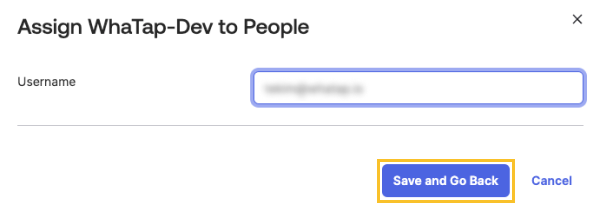
Click the Save and Go Back button.
-
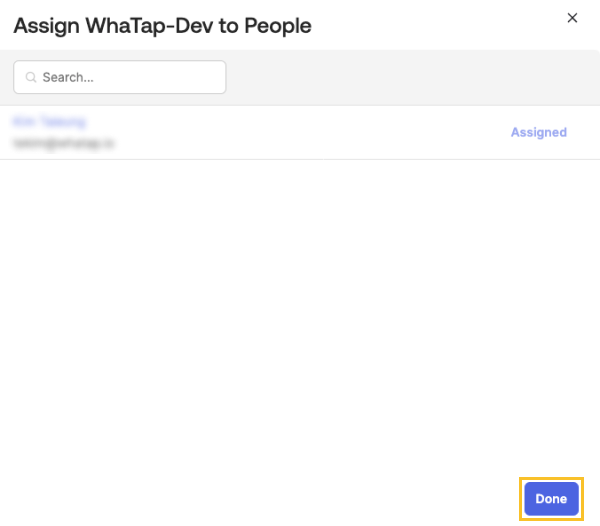
Click the Done button.
Verifying the integration
-
On the Okta Admin page, go to the General tab of the previously created application.
-
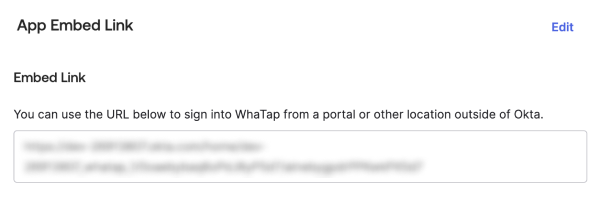
In the App Embed Link section, copy the Embed Link URL.
-
Navigate to the copied URL in your web browser.
-
Verify that the WhaTap monitoring service screen appears. If the screen appears, the integration is complete.
- During the initial SSO integration, if the email account already exists in WhaTap, link information registration is automatically performed through password authentication.
- If the email account does not exist in WhaTap, membership registration and link information registration are automatically processed after entering the required information.