Microsoft Entra ID Integration
This guide explains how to set up SSO login to the WhaTap monitoring service using Microsoft Entra ID as the Identity Provider (IdP). You can log in to the WhaTap service with your Microsoft Entra ID account and use the service within the assigned permissions.
For more information about Microsoft Entra ID, see the Microsoft official documentation.
Prerequisites
Complete the following before starting the Microsoft Entra ID integration.
- Generate an SSO key from WhaTap: Copy the EntityID and Sign-On URL values.
Verifying your WhaTap account
The email used in Microsoft Entra ID must match the WhaTap account email for integration.
-
If you have an account: Verify that the email addresses are the same on both services.
- WhaTap: monitoring1@abc.com / Entra: monitoring1@abc.com → Integration possible
- WhaTap: monitoring2@abc.com / Entra: monitoring3@abc.com → Integration not possible
-
If you do not have an account: A one-time authentication is required.
-
Log in to My Apps portal with your company or school account.
-
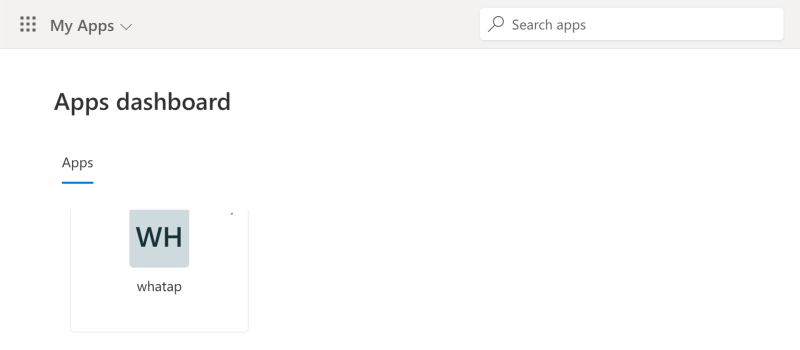
In Apps dashboard, click the registered WhaTap application.
-
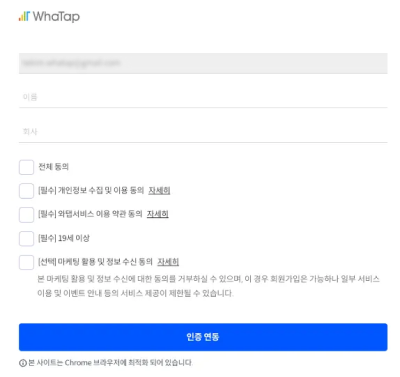
Enter your name and company information to complete SSO integration.
-
If an error page appears, close it and click the WhaTap application again in Apps dashboard.
-
Creating an enterprise application
Log in to the Microsoft Entra Admin Center and follow the steps below.
-
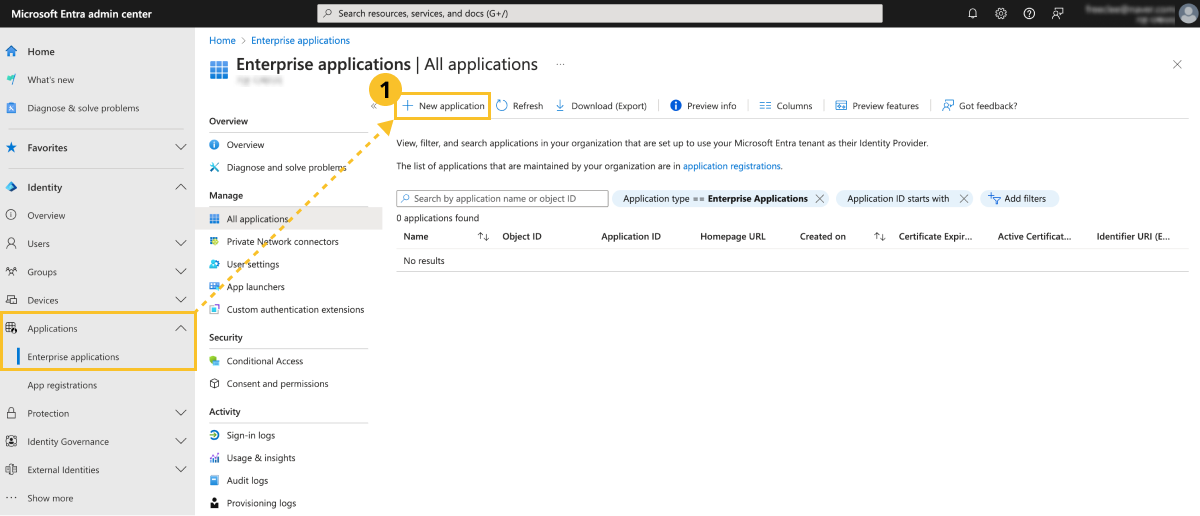
In Identity > Applications > Enterprise applications, click New application.
-
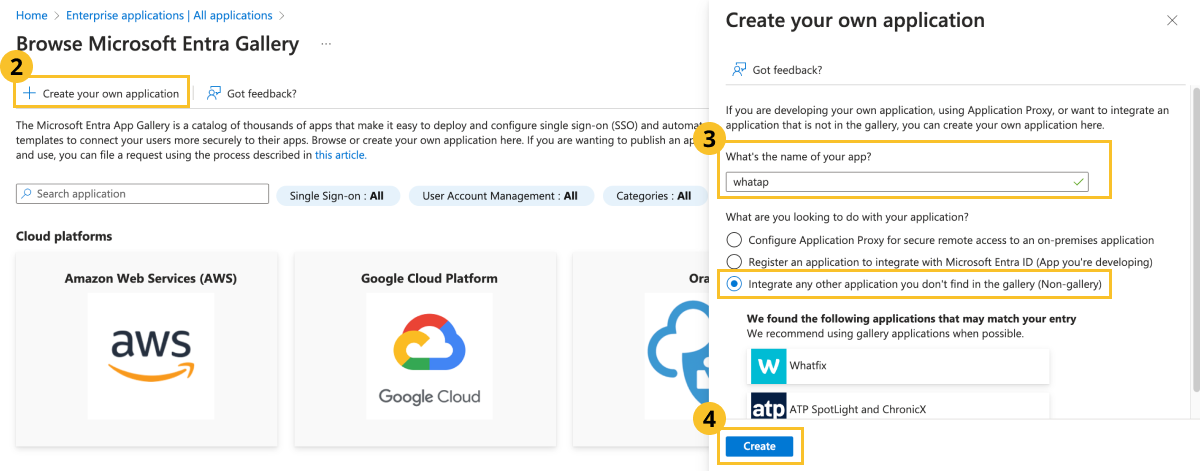
Click Create your own application.
-
Enter the app name and select the Integrate any other application you don't find in the gallery (Non-gallery) option.
-
Click the Create button.
Assigning users
Assign users to the created enterprise application.
-
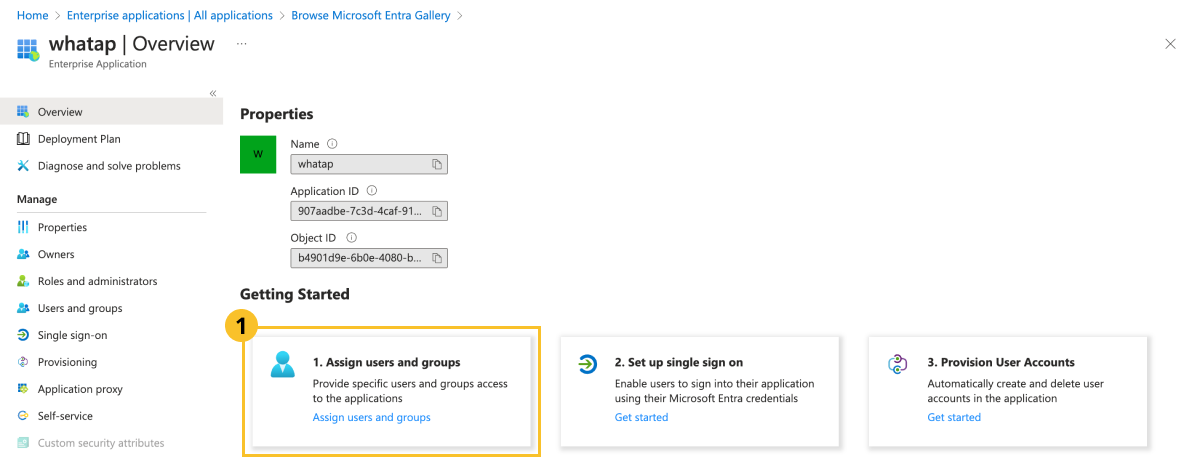
Click Assign users and groups.
-
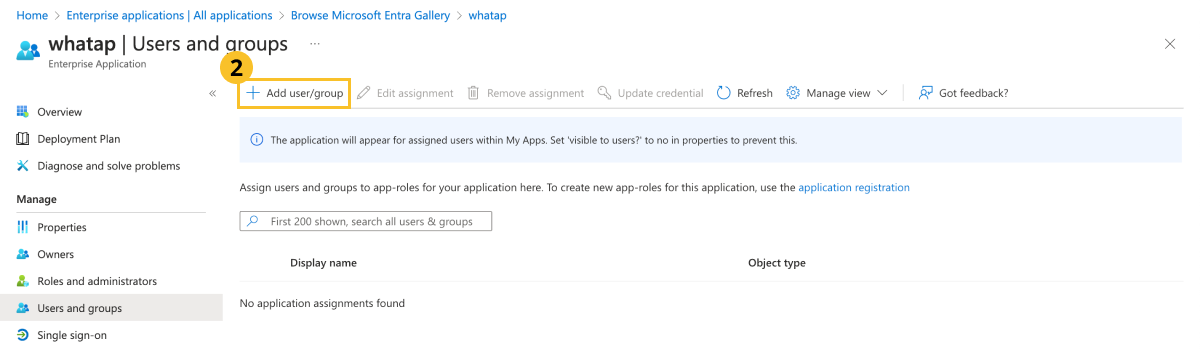
Click Add user/group.
-
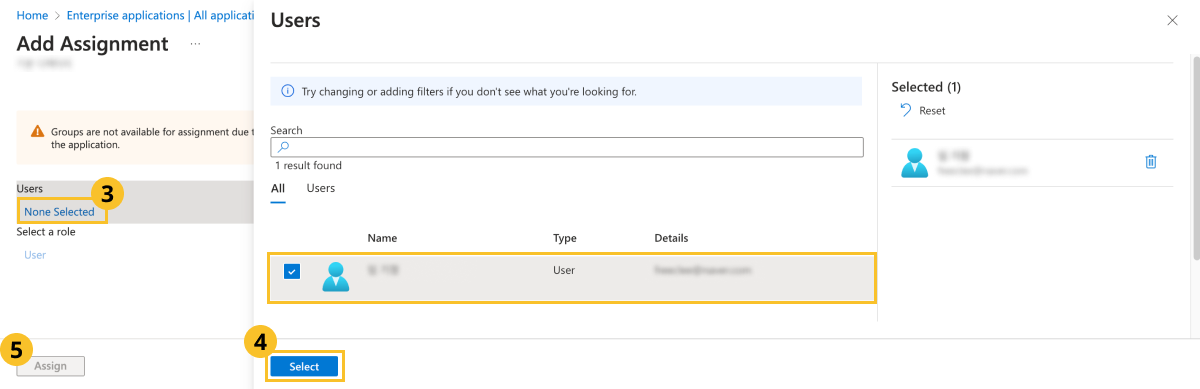
In the Add Assignment screen, click None Selected.
-
Select the users to assign and then click the Select button.
-
Click the Assign button.
Configuring SAML authentication
Configure SAML so that users can log in to WhaTap with their Microsoft Entra credentials.
-
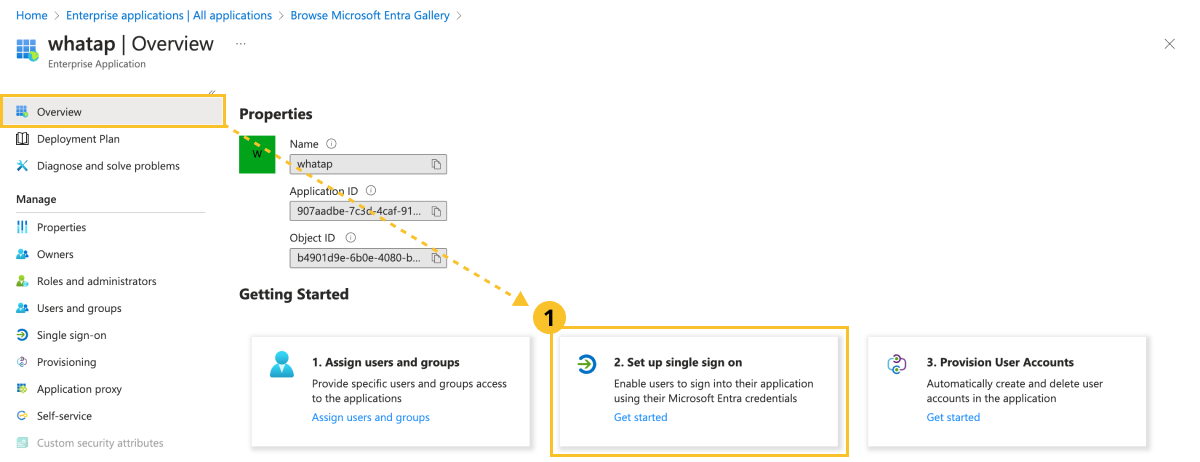
In the enterprise application's Overview, click Set up single sign on.
-
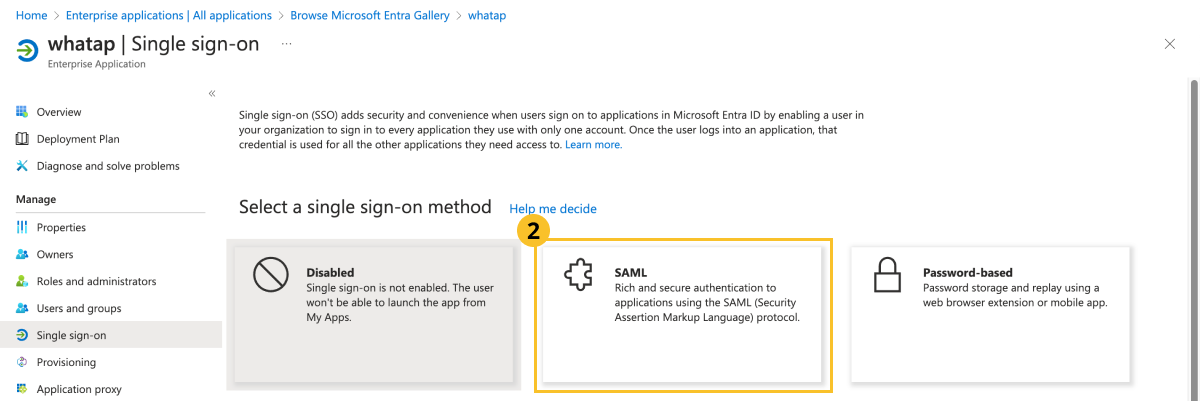
In Select a single sign-on method, click SAML.
-
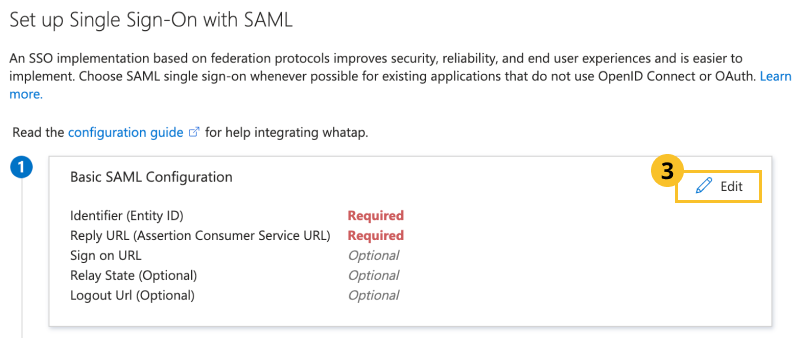
In Basic SAML Configuration, click Edit.
-
Enter the WhaTap SSO information.
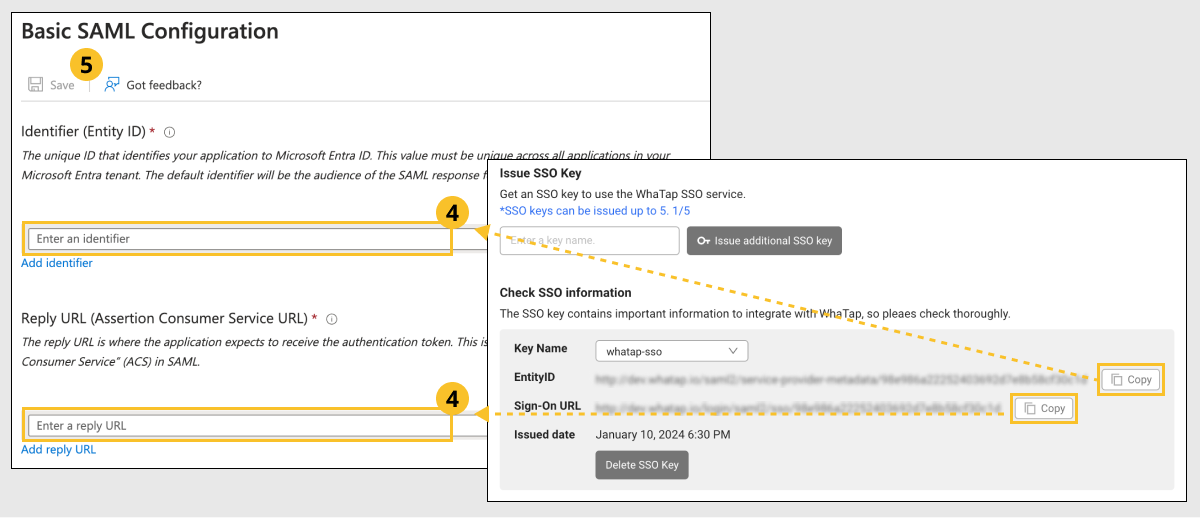
- Add identifier: Paste the EntityID value from WhaTap.
- Add reply URL: Paste the Sign-On URL value from WhaTap.
-
Click the Save button.
-
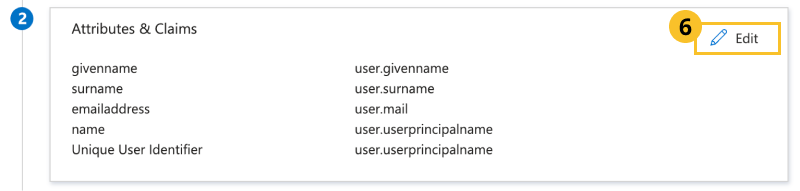
In Attributes & Claim, click Edit.
-
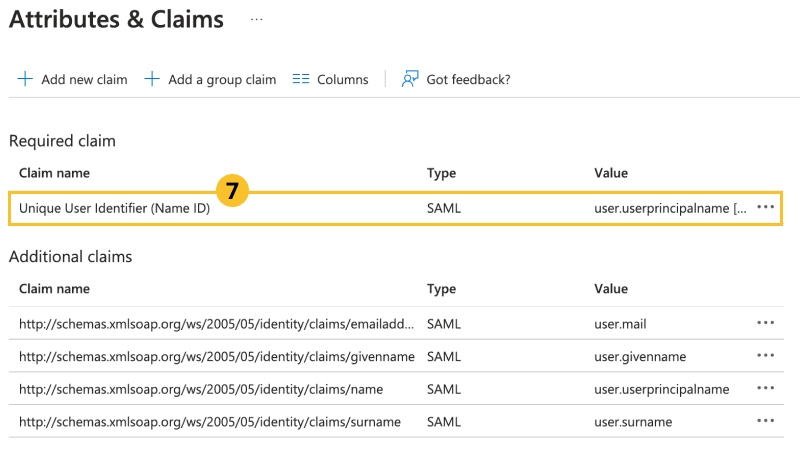
Click Unique User Identifier (Name ID).
-
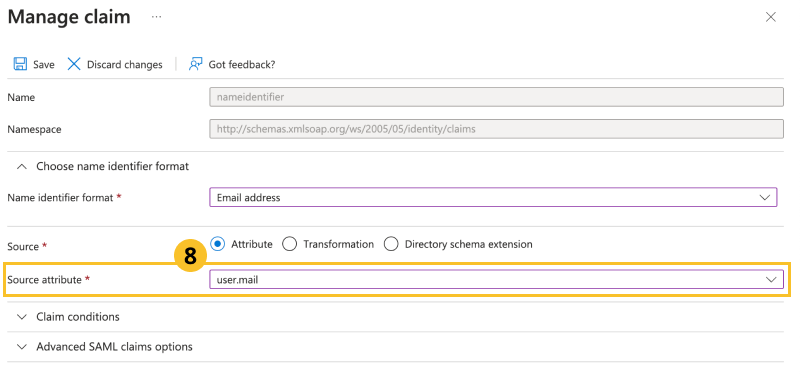
In Source attribute, select user.mail and then click Save.
-
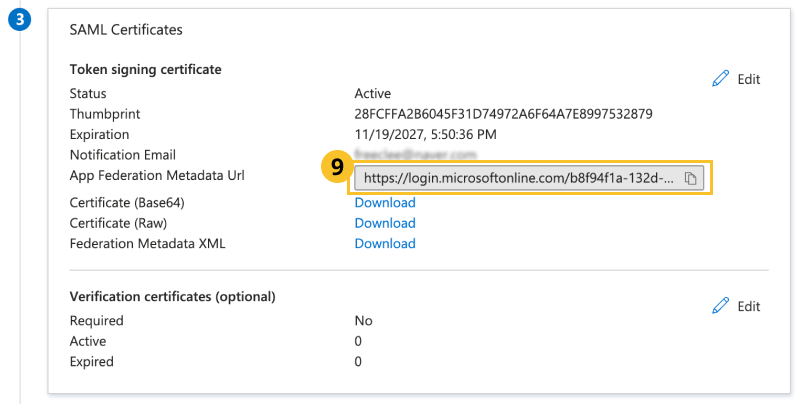
In SAML Certificates, copy the App Federation Metadata Url value.
-
Register the copied metadata following the WhaTap External IdP registration procedure.
Testing the integration
Test whether SSO works correctly from the Microsoft Entra ID screen.
-
In Test Single Sign-On, click the Test button.

-
Click the Test sign in button.
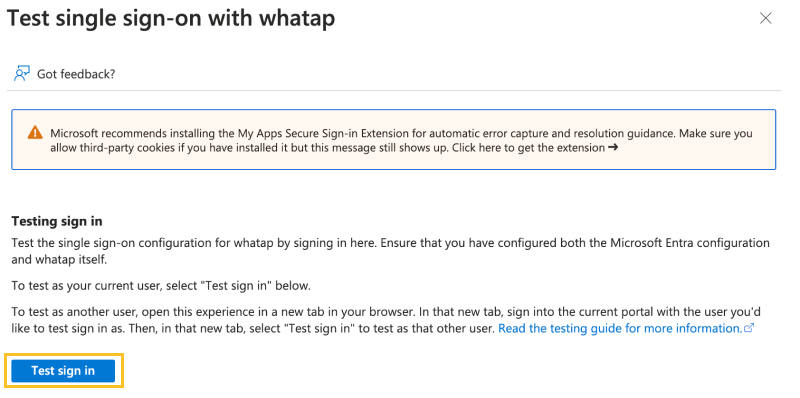
- If you have a WhaTap account, the WhaTap monitoring service screen appears.
- If you do not have a WhaTap account, you can create a new account through SSO integration.
Managing accounts in the enterprise application
To manage WhaTap accounts in the Microsoft Entra ID enterprise application, go to the My Apps portal.